Are you looking for the right platform or the Webwatcher login portal?
Then thank your stars as you have landed at the exact right spot.
Webwatcherdata login is a security Expertise-registered computer and phone system monitoring programme.
If you have a Web Watcher membership, you can conveniently sign-in to manage your profile via an online platform.
It works for smartphones running iOS, Windows, Android, and Chrome OS.
Calls, text messages, call logs, browser history, images, GPS, and many more are all recorded by Web Watcher Mobile.
Staff can access their registered calls, text messages, addresses, call records, internet browser history, images, and GPS by logging into their online accounts at login.webwatcher.com. You will get the username and password for this login portal from the company itself.
You must have access to a few items in order to log in to Web Watcher Data. If you have these items, you will be able to sign in without difficulty:
Internet: To sign in without difficulty, the client must have an effective and reliable connection to the internet.
Mobile App or Web Browser: You can also use an app or an internet browser to sign up.
Permission: You should sign in if you have already established a profile. Otherwise, you’ll have to become a Web Watchers client.
Private Device: It is recommended that you sign in with a private device to keep your data secure.
Webwatcher Login Process Step by Step Guide
First open your web browser and go to https://login.webwatcher.com/en/account/login
WebWatcher Login
Next enter your Email and Password in the given fields.
Now tap on the Blue Login button and you will be signed into your account.
Forgot Password for Webwatcher Account?
Open your web browser and go to https://login.webwatcher.com/en/account/ForgotPassword (You can also navigate yourself from the Login page by clicking on “Forgot your username and/or password?” option.)
Now enter the email in the given field which you used during the sign-up process.
Now press the blue Submit button.
(If you don’t seem to remember your username then tap on the “Forgot your username?” box and then enter your email address.)
How to Register WebWatcher Account?
If you are a new user and would like to build your own account, simply follow these instructions to do so.
To begin, open your web browser and go to https://login.webwatcher.com/en/account/signup3
Here you must enter the asked information like Name, Email Address, Password.
Now tap on the “I am not a Robot” box
Next Click on Create Account.
After this step you will successfully create your Webwatcher account in order to use its different services.
Final Words
Web Watchers is a fantastic piece of software that allows you to keep track of your child’s actions and keep an eye on them from afar. It also helps in surveillance work on the shady employees and more.
So, just follow above WebWatcher login steps and start using this amazing mobile phone tracking software.
Just joined the American Airlines and don’t know where to check your shifts and work schedules? No worries, here you will learn how to login to my.envoyair.com portal to check your shifts, work schedules, airline announcements and news.
MyEnvoyAir is one of the largest regional carrier service for American Airlines. At MyEnvoyAir portal where American Airlines employees can check their work related information from anywhere using there desktop or mobile.
You can handle and stabilise your work with yearly growth prospects using this platform.
Many of the savings and retirement opportunities available by MyEnvoyAir career details are detailed for each worker according to their position.
MyEnvoyAir gives you job rights, bonuses, and a complete rewards programme that you won’t find at any other company.
If you have domestic parents or family friends, they can be able to benefit from your work rights at MyEnvoyAir.
So, if you wish to get different benefits from this online portal then you must know how to sign in to Myenvoyair.com.
How to Login to Myenvoyair Portal Step by Step?
Follow below steps to sign in into MyEnvouAir account –
First copy this URL my.envoyair.com and paste it into the search bar of your browser.
It will land you on the MyEnvoyAir login page here smlogin.aa.com
Now, provide your AA ID, Password, and click Login button.
MyEnvoyAir Login Page
That’s it. This is how you can access your MyEnvoyAir account.
How Do I Reset MyEnvoyAir Account Password?
To recover your MyEnvoyAir account password, you just need to click on the Forgot Password? link showing right below the login form or you can direct visit this URL sam.aa.com. Here you need to provide your 8 digit AA ID and click Next. Follow the further instructions to finish the password recovery process.
If have any further problems while resetting password, visit helpdesk.apps.aa.com to chat with MyEnvoyAir’s customer care service directly.
They will provide to both active and retired employees of American Airlines.
Benefits of MyEnvoyAir
Medical options are available to a worker.
Dental choices are provided to the staff.
Basic life and AD&D insurance for employees
Vision coverage for employees
Employees are entitled to retirement and savings plans, which are referred to as financial benefits. “Performance bonuses, Employee credit union, and 401(k) with matched funds” are examples of such advantages.
Optional services available to employees include critical condition premiums, health care bonds, long and short disabilities, community legal plans, voluntary life and AD&D insurance, and flexible spending accounts.
If you work for Myenvoyair for more than a year, you will receive 7 days of paid holiday, and if you work for more than 14 years, you will receive more than 40 days, almost four weeks of vacation.
Envoy will give you 11 paid days off every year if you are sick during working hours.
You will be given the guidance and services you need to reach your full potential in your career.
You will now have access to a diverse variety of career opportunities.
Internet-based tools.
Access to an internal career search service that is accessible online.
Classroom-based enrichment programming.
Final Words
Only if you are an American Airlines or Envoy employee, then can you get the perks and health privileges listed above with your MyEnvoyAir account.
If you attend LCPS (Loudoun County Public Schools) and are having trouble signing into the Lcpsgo portal, then this post should provide you with all of the information you require.
Here you will learn how to login lcpsgo classlink and how to recover forgotten password.
So, let’s get started…
LCPS Go is a website that allows users to browse LCPS’ online applications. These data are recorded and stored and accessible at lcps.org.
This site is simple to use on a smartphone, handheld device, or desktop computer.
You will expand the learning experiences with the Lcps go by get into your account at launchpad.classlink.com.
With the right metadata and passwords, all of the stored data can be read.
We’ll go over everything you need to know about the lcpsgo login process in this post.
Students and teachers can use a single LCPS login platform to access their account on Mac, Windows PC, iPhone, and Android mobile.
Below are the steps you need to follow –
First, open this URL of www.lcps.org in your browser and click on “Click Here to Login to LCPSGo (Classlink)”. Or you can direct visit this page launchpad.classlink.com/loudoun in your browser.
Next LCPS login Go login page will open.
LCPSGo – Sign in to Classlink
Type in your username and password, then press Sign In button.
You can also sign in using Quickcard.
LCPSGo Quickcard Login
That’s it. This is how you can Sign in to LCPSGo Classlink account.
How to Reset LCPS Go Password?
What if you forgot your LCPSGo account password? Well, it’s easy to recover it.
Just click on “Help, I Forgot My Password” link showing right below the the login form. It will redirect you to the Reset Password page where you need to provider your username and click on Right Checkmark.
You will get an email with further details, follow the email and you will recover the password in just few minutes.
After creating a new password, return to the login tab. This procedure can be carried out on both a laptop and mobile.
The Lcps Intranet programme provides connections to internal staff of Loudoun County Public Schools.
This program is open to staff 24 hours a day, seven days a week.
You can get reference to these sites by visiting the official website and following the links. You can also find a student and staff list here.
Wrapping it up…
In brief, this was the right LCPSGo login process.
If you are experiencing any technical issue then do contact the technical department of LCPS.
FCBResource (First Community Bank) is a community bank that provides financial services and merchandise. Users can enter the accounting method via this login gateway at this financial company, which has been upgraded with the Fcbresource.
The company’s headquarters are in Virginia, and it was established in 1874.
Ever since, FCB has built a large customer base, and the bank has opened and serves 50 banking locations in West Virginia, including Grafton, Richmond, Carolina, and East Tennessee.
You will use the Fcbresource username whether you are a client of First Community Bank or a Wealth Management partner owned by Wholly.
Using Fcbresource online banking, you can review your account balance and track your investing service using this Fcbresource login portal.
Other login portal links will be supported by various outlets, but they may not function or be inactive at times.
We get the active connection to the fcbresource online banking with this in mind.
Register to Fcbresource
Step 1: The first step is too open FCB. Copy and paste this URL jha.loanspq.com into a new web browser.
Step 2: The page will load after you click “Open an Account.”
Step3: In the given area, type your zip code, and then press the “Continue” button.
Step 4: Assume you have access to FCB’s online service in your region. In that scenario, you can access the updated information form, where you can type your details in the given fields and completing the procedure, which includes generating a password and sending a verification connection to the email address you provided.
Step 5: Once you have logged in successfully, you can handle and invest in the upgrade fields that have been presented.
Fcbresource Login Step by Step
Step 1: First open a web browser and type www.fcbresource.com into the address bar.
Step2: On the online home page of the First Community Bank, look for the login menu in the top right corner.
First Community Bank Login
Step3: Tap on the “Login” icon after selecting “Online Banking” and entering a username in the given area.
Step 4: The browser will load to the login screen, where you must type your FCB password and then press the “Login” key.
Step 5: You’ll be logged into your FCB account, and you’ll be able to see where you can spend and handle your account quickly.
Forgot Password?
To recover your forgotten password, first click on the Forgot Password link right below the login form. In the next screen provider your online banking user ID, email ID and email subject.
Fcbresource Forgot Password
They will send you email with further details follow those instructions and you will recover your account password successfully.
Once you’ve reset your password, go to the login tab, type your username and new password into the fields given, and then press the login button.
Final Words
Fcbresource is among the most user-friendly and fast online platforms for managing your profile and viewing your investment portfolio.
Myhdfs (MY Harley Davidson Financial Services) is an online site for Harley Davidson motorcycle loan management. Using their official web portal at www.myhdfs.com you can make deposits, apply for new loans, access transaction info, and much more.
Harley-Davidson motorcycles are very popular not only in the United States, but also anywhere else on the planet.
To entice people who cannot afford to purchase the bike of their choosing with a single payment, the firm provides a wonderful low-interest loan programme.
The online account has made it much easier to make payments because the electronic payment system is much safer, faster, and more convenient.
Knowing the right steps of Myhdfs login process you can access your loan account information, send a loan payment, get an estimation of the amount due, display your statement, submit a paperless statement, and change your contact information, among other things.
If you have a laptop or a mobile device with internet connection, you can access your Myhdfs account at any time.
The official URL for MYHDFS or Harley Davidson payment service, is https://www.myhdfs.com/, and you can log in using your special account credentials to use the free site.
The service is open 365 days a year and is free to use. You can even call the Myhdfs customer service on (888) 691-4337 for any further query.
So if you have just registered an account and don’t know how to sign in to myhdfs.com then below are the exact steps you need to follow –
Myhdfs Login Steps to Use My Harley Davidson Financial Services
Login to Myhdfs website is pretty simple and you can get into your account in just few steps from your desktop or mobile.
1. First, open the My Harley Davidson Financial Services official website at www.myhdfs.com.
2. On the homepage, you will find a Sign in Form right below the header area.
My Harley Davidson Financial Services Login
3. Provide your Email, Password and hit the Sign In Button.
That’s it. If your credentials are right then you will be logged into your account.
In case, if you forgot the password then just click on the Reset Password link showing right below the Login form. Follow the further instructions to recover your account password.
Myhdfs Forgot Password
Highlights of Harley Davidson Credit Corp
It’s completely free to download.
Available at all times of the day and night.
Allows people to keep track of loan payments and applications.
Provides free customer service.
Conclusion
So, this was all about Harley-Davidson Financial Services. Follow the above guide to login to your Myhdfs account and avail its different financial services.
Skyslope.com is a transaction management service for realtors, real estate agents and brokers. If you are new to this service and thinking how to access this website to leverage its benefits then read on to know the exact skyslope login steps you need to follow.
SkySlope was created with the aim of assisting consumers in completing purchases by neatly arranging records and maintaining compliance with real estate laws.
SkySlope is one of a kind when it comes to transaction processing software.
SkySlope has established its own digital signing framework in accordance with the E-SIGN Act and the European Union’s eSignature Directive.
Their online transaction processing platform saves you the time and effort of dealing with conventional trading systems that need a lot of paperwork.
It is the most widely used transaction processing platform in the real estate market.
Let’s look at the steps to Login to Skyslope account –
Skyslope Login Steps
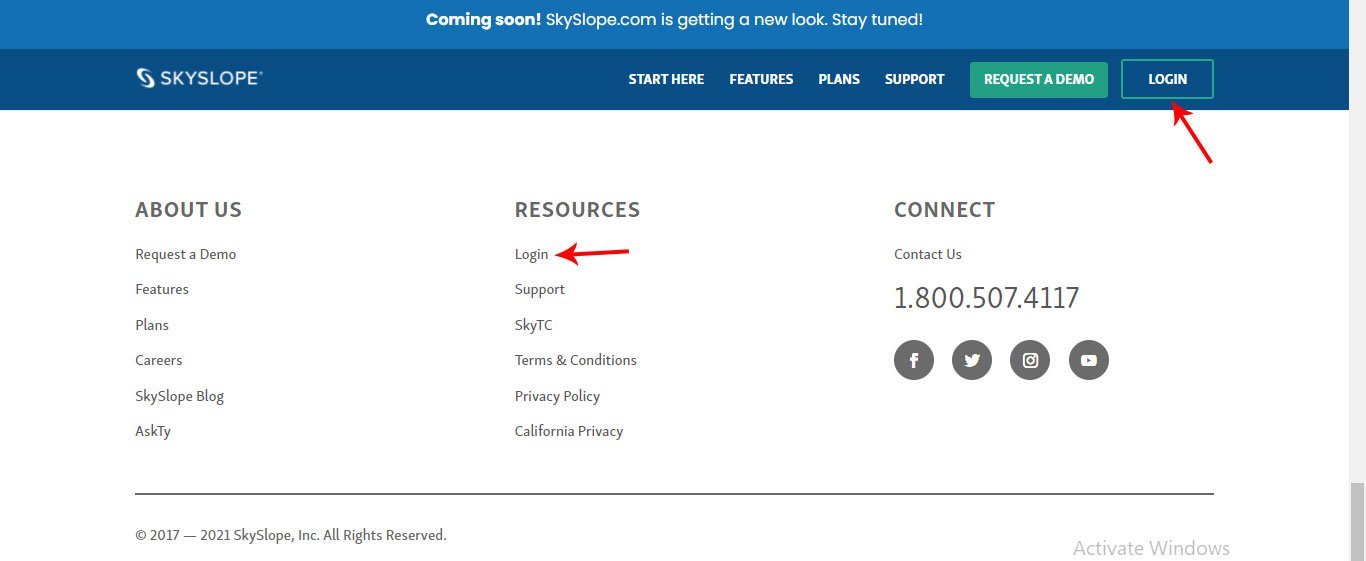
Below are the steps users need to follow to access secure Skyslope customer login page –
Now click on the Login Button showing top right side of the navigation bar. You can use Sign in link showing in the footer as well.
Skyslope Login Options
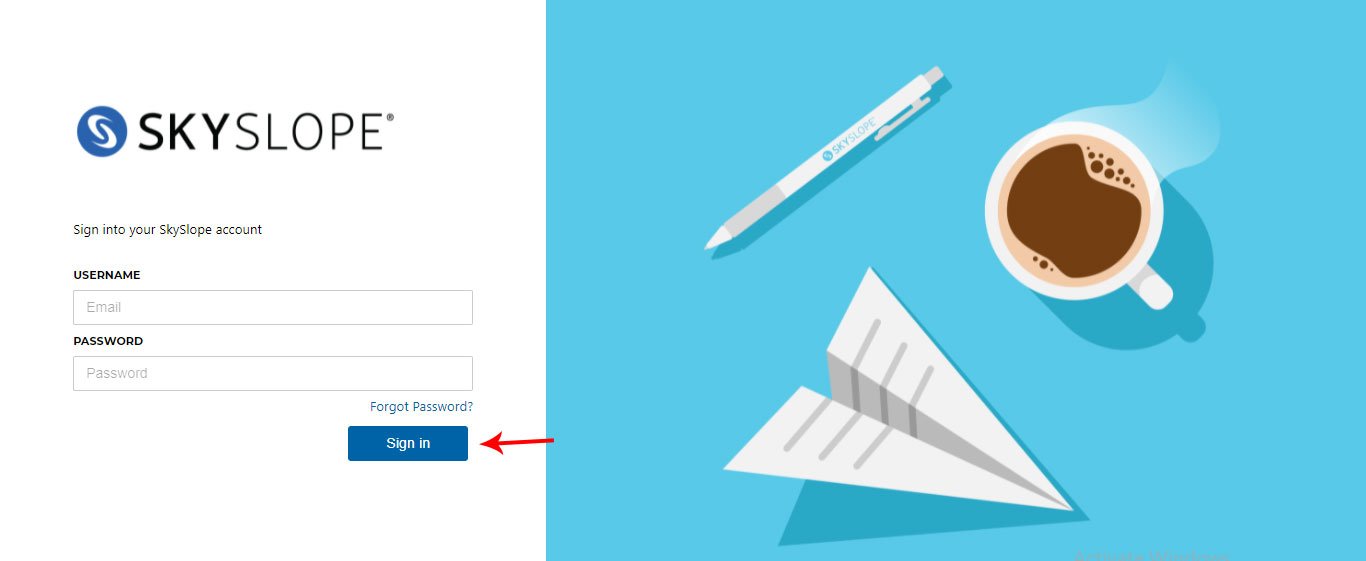
Next, you will land on this page auth.skyslope.com with require login fields.
Provide your Username (email) and password.
Sign Into Your Skyslope Account
That’s it. This is how you can sign into Skyslope website from your desktop.
How to Recover Skyslope Account Password?
What if you have forgotten your Skyslope.com password? No worries, it’s pretty easy to recover your password in just few steps.
First, open the SkySlope login page following above steps.
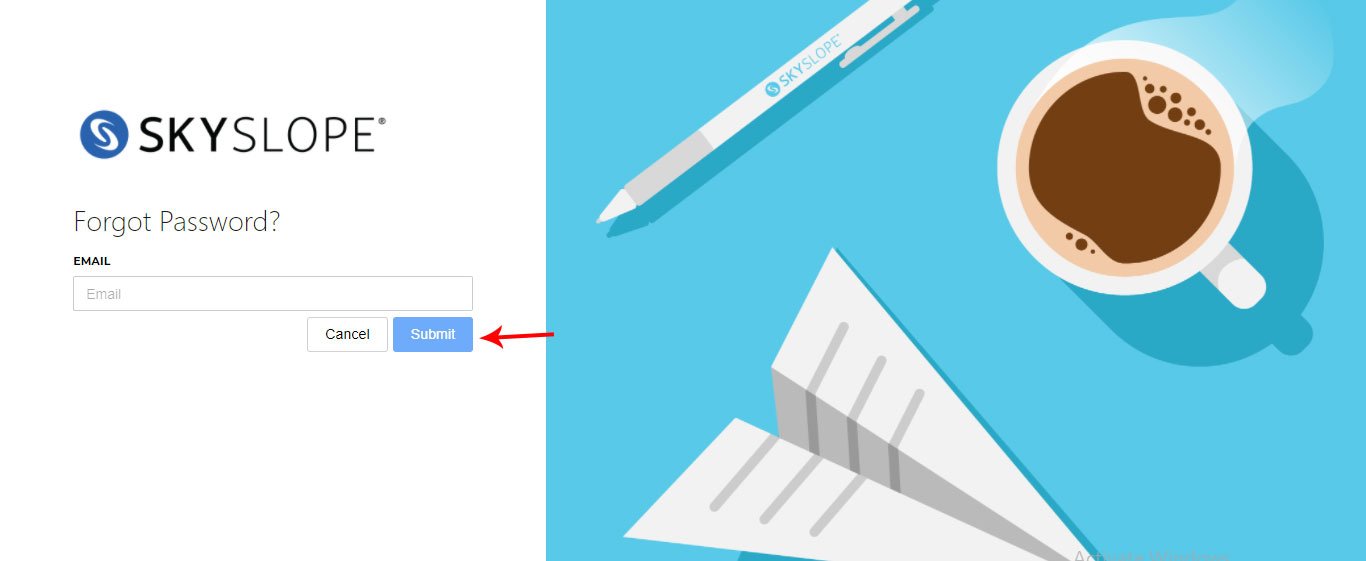
Now, click on Forgot Password link showing right above the Sign In button.
Skyslope Forgot Password
Next, you will lend on this app.skyslope.com Forgot Password page.
Provide your Email Address and hit Submit button.
app.skyslope.com Forgot Password Page
Advantages of Using Skyslope.com Website
They have a specialised team of people who examine the activity of brokerage within an organisation, corporation, or team of agents and brokers.
Users will also verify that any of the necessary paperwork for a property is planned and arranged using the real estate transaction management solution.
SkySlope creates personalised checklists for each transaction and listing, taking into account the particular and precise paperwork criteria.
SkySlope allows users to monitor emails and text messages sent by brokers/agents to their customers.
SkySlope will also monitor all of the actions performed by brokers and agents for each transaction.
With the help of SkySlope’s digital footprint, the programme keeps track of all that happens on its website.
Conclusion
So, if you are new to skyslope.com website then above Skyslope login guide is worth to check once.
It will help you to access your Skyslope customer account without any hassle from PC.
Golsn.com is a Local Sales Network which has a new web address called lsn.com. In this detailed tutorial I will discuss golsn login and sign up process step by step. Besides it, I will also discuss different features and mobile app of this free classified website.
So let’s get started…
It’s a website that links salespeople, clients, customers, and users through a local sales and advertisement network.
This free classified site is well-known for providing a plethora of communities and categories where people in America can buy and sell products.
Any parts of the Go LSN website are set up to appeal to unique requirements that users may have.
The website has listings for a variety of users, including job applicants and employees, as well as people looking to sell or purchase items on the internet.
To put it another way, the Local Sales Network is an internet advertisement network that delivers and sells a network of products and services to customers across the United States of America.
This is made possible by encouraging people to sign up and then post an advertisement for others to see.
The local Sales Network also has an app to make its services more accessible.
LSN (Golsn) Mobile App
LSN Mobile App
The Local Sales Network has released an android app for its customers that offers a variety of resources and is designed to make navigating its site safer for its millions of customers.
This choice was added to allow users to get the most out of the LSN App in terms of advertisement products and services as well as user interface.
The resources offered include the ability to browse and scan with ease, post items, merchandise, and services, and control your ad using the app’s multiple facilitated tools.
The GOLSN network allows you to browse through sections of the website by simply clicking every available button.
Ad Option or Keyword
This is the field where you can type in the title of a keyword or the description of a certain service or product advertisement.
For instance, you can enter the term “cat” and press the GO button to see the results or choices for cats and cat-related products.
The findings would be extensive, allowing you to narrow down your options and find just what you’re searching for.
You’ll be able to use search filters after entering a keyword into the GOLSN homepage. From here, you can choose the ad form that best fits your needs, such as “for sale,” “wanted,” “trade,” or “free.”
You should also choose the kind of vendor you choose to deal with. Either “private party” or “company” comes to mind.
You can also check the box in your filter if you need pictures for your order.
It’s also a good idea to check at the price level of the product or service you’re interested in.
The min and max price ranges can be filtered and searched.
You can also limit the quest to items posted recently or within a certain time frame; for example, you can choose items posted in the last 24 hours, the last 3 days, or the last 7 days.
You can select the item’s place as well as a list of recent searches related to the item you’re looking for.
If you use the keyword ‘kitty’ as a search keyword or ad, you can also choose the type in which your word will be linked.
If you’re looking to buy a pet, the group “Pets and more” is the perfect place to look.
This is because it will narrow down your hunt for Pets and Other products.
How to Sign Up On GOLSN Website?
If you are a first-time client of the site, you will have to create a golsn account. This will make it easier for you to find and market your stuff.
But first and foremost, you must have an account.
Below are the steps you need to follow to register an account on lsn.com (golsn.com)
First, open the Golsn website lsn.com in your browser.
LSN Com Registration Steps
Now, click on Register button showing left side of the search option in the header area.
Next, provide your information like Zipcode, email ID, username and hit Register button.
LSN (Golsn) Sign Up Form
After that, an authentication link will be sent to your email account, which you must press to confirm that the email address associated with the golsn website is yours. Your account will be ready after you’ve completed it.
However, please read the firm’s Terms of Service and Privacy Policy while registering.
LSN or Golsn Login Steps
To access the GOLSN network at lsn com follow below steps –
First, open the golsn website at lsn.com
Now click on login link showing right beside the logo. They have also provided Login option in the search area below the header.
Golsn (lsn) Login
Next, enter your username and password.
Click on Login button
Golsn Login Page
That’s it. You will login into your golsn account where you can see different ads and can even post your ad as well.
GOLSN Account: Things You Can Do
To view your account records, post an ad, review the comments and reactions to an ad you previously submitted, check notifications from new clients or consumers, update your page, update your profile from simple to paid, and so on. To access ‘My Account,’ you must first log in.
Enter your name, change password, mailing address, change your state, areaor zip code, enter your phone number(s), and identify your account form all from your profile (individual or business).
How to Post an Ad on GOLSN
Change your account information – you must upgrade your account details. Before you may submit an advertisement, you must first enter your username, mail address, and contact information.
Use a category – You must select a category and subcategory that refers to the object you want to sell falls.
Choose ad period – you must select the length of time over which the ad will appear on the website. Often, insert the ad title, which is essentially the name of the product you’re promoting.
Choose an ad format – you can use a map of your area if you like. Then choose an ad form, which would be anything you want to market (for sale), something you want to exchange (for some item from the interested party), or something you want to advertise for free.
Pricing – type in the price you wish to sell the item at, as well as the item’s definition.
Including your contact details – Choose whether or not you want to be reached by phone, email, or both. Important: Press the ‘continue’ button to upload a photo of the item you’re selling.
Continue – When you’re done, click continue to finish the article and afterwards click “post free ad.”
Note: Please keep in mind that your free ad slots will be limited to ten. This implies that after the first free commercial, you’ll only have 9 more to choose from. To get the maximum benefit of ads, you should change your ad to a paying one. You can select the highlighted ad that will appear for 30 days in the featured pages. Obviously, the blog will get more visitors and better advertising.
Conclusion
GOLSN is the place to go whether you’re looking to purchase, sell, or even advertise. So, if you need to promote your products and services in order to generate revenue, you can join this Local Sales Network and build an account.
The Pennsylvania Turnpike (PaTurnPike.com) is a toll highway in Pennsylvania.
It stretches for 360 miles through the province. Furthermore, the turnpike starts at the Ohio state line in Lawrence County and continues at Ohio Turnpike. It then came to an end at the New Jersey state line.
Additionally, you can use the official website to login to your PaTurnPike account and make toll tax payments.
Clients who have used a PTC-operated toll highway will pay their receipts digitally.
An account number, postcode, invoice number may also be used to gain access to the Pennsylvania turnpike.
After logging in, you should be able to access invoices, vehicles, dispute tolls, and upgrade information, among other things.
If you’re looking for information on PATurnpikeTollByPlate username, you’ve come to the right location.
Today, we will share the method, login operation, and many other details about the PATurnpikeTollByPlate portal with the aid of this post, so without further ado, let’s get started.
The PATurnpikeTollByPlate is a licence plate tolling scheme that is only available at digital payment tolling points on the PA Turnpike for e-ZPass users.
The licence plate of the car seen by the camera device, on the other side, is placed at the toll lanes as it exceeds the legal speed limit.
Clients can pre-register their cars under the PATurnpike TOLL BY PLATE programme to receive monthly receipts by email or US Postal Mail.
Advantages of PATurnpike Toll by Plate Account
On the toll calculator page of the PA Turnpike website, you can conveniently locate toll rates. Moreover, under printable toll schedules, the page contains a toll schedule.
Customers still have the option of creating an e-ZPASS account and receiving a reduced toll rate when they get a TOLL BY PLATE invoice in the mail.
E-Zpass would still be the fastest and most convenient way to pay tolls on the Pennsylvania Turnpike.
Additionally, E-Zpaas is the only method of payment accepted at all PA Turnpike sites.
You can also use the PA Turnpike TOLL BY PLATE method to drive with a PA car.
As a result, the firm can charge a fee.
You will easily open a Pre-Registered TOLL BY PLATE account if you want to be explicitly invoiced for your rented vehicle TOLL BY PLATE ride.
Within 48 hours of travelling on the PA Turnpike, rental vehicle information can be added to a pre-registered TOLL PLT account.
Paturnpiketollbyplate com Account Login Steps
You just need to follow the basic steps mentioned below to sign in paturnpiketollbyplate.com website –
To start, clients must open their browser and go to the official website, which is www.paturnpike.com. It is a genuine URL that will take you to the homepage.
Then you’ll be taken to the home page, where you’ll see the “Login Section.”
Simple click to make the payment.
After that, you must fill out an empty box with information before pressing the send button.
The user can now log in to their account. Examine each detail one at a time.
Bottom Line
As a whole, the toll calculator page on the PA Turnpike website makes it easy to find toll rates.
The best thing is that under printable toll schedules, you will even find a toll calendar. Additionally, you should switch your Toll By Plate account to an E-ZPass account. As a result, you will have to pay less for your trip.
Next go to the video under which you wish to translate a comment
Now find the comment you wish to translate (i.e any comment in different language than English)
Now locate the “Translate” button beneath the comment
Click on the “Translate” option and the comment will be translated into English language.
This way you will be able to get hold on all the comments that you or any other video has received in a different language.
Over two-thirds of a creator’s spectator view time arrives from outside their home region on average.
Make your videos fully available in other countries with the translation resources to expand your foreign audience:
Metadata that has been translated can improve the scope and discoverability of a video.
For audiences who speak some other languages, translated video titles and descriptions may appear in YouTube search results.
All of your videos with subtitles can be found and watched by viewers who speak other languages. Extremely difficult or deaf audiences, non-native speakers, and viewers in noisy settings will all benefit from captions and comments in the same language.
How to Get Community Tab on YouTube: Community posts are simple engagement mechanisms that enable Users with at least 1,000 subscribers to connect with their fans in ways other than video.
You can both offer fans a closer insight at your universe and share your imagination by using various content styles.
They’re available to anybody who visits your Community page, and if Subscribers are opted in, they’ll get them in their Subs feed or updates.
You’ll learn how to set up and use Community posts to successfully reach communities in this tutorial.
The Discussion page, which was formerly an optional discussion field for YouTube channels, has been replaced by the Community tab.
Visit your channel and check below your channel art to see if you have the latest Community tab.
The Community tab will appear in place of the Discussion tab if you have it installed.
The ability to post is the only distinction between the current Community page and the existing Discussion tab.
Based on the channel’s Discussion settings, the Discussion tab permitted developers, viewers, and visitors to post only text-based status notifications and responses.
The Community tab provides a Facebook-like experience for platforms, allowing creators to share different forms of status updates – text, photos, connections, and more.
When you click on community tab option it will display an empty message.
Select YouTube channels (both authenticated and non-verified) with over 10,000 subscribers can get the Community tab first.
Like other social networking sites, the feature would most likely start with bigger brands, sponsors, and successful YouTube creators before being rolled out to the rest of the world.
Join the community content of networks you subscribe to by visiting their Community tab or viewing the Subscriptions tab of the YouTube app to get ideas for your own community posts.
You can use the latest YouTube channel Community tab to target viewers in the following ways until you have access to it.
The “highlighted” content in the descriptions are group posts that can be reached by selecting the timestamp of the message. They aren’t videos that the YouTuber has chosen to showcase.
Make a Video to Introduce your Community Tab
Since YouTube subscribers and visitors demand video from your site, it may be wise to start with a video when introducing the Community tab.
Open the tab and copy the URL from your browser’s address bar to include a shortcut to your Community tab in the video summary. Upload the info on your Community tab so that new-comers to this tab understand how to interact with your channel.
Encourage People to Turn on Notifications if they Haven’t Already
Using a clip or a group post (or both) to let people know how to get updated about your new channel operation, in addition to letting them learn about your Community tab.
The Purpose of Your Community Tab Should be Specified
The first post on your Community tab is the ideal spot to greet your YouTube viewers and explain your goals. This tab on YouTube recommends that you create a creed as a way to develop a strong society.
Promote the Goods
On the Community page, you can sell items to channel subscribers and travellers. Create a status update with a picture of the brand and a link to the product’s sales page and post it to the tab. To monitor the results, consider having a special landing page on your website for your channel subscribers and offering an exclusive discount only for YouTube visitors.
Conclusion
The Community tab on YouTube enables developers to interact with their viewers and guests in ways other than video. Post status messages, ask questions, invite visitors to ask questions, poll your followers, and more on this tab, much as you would on your Facebook page’s wall.
Don’t know how to make a YouTube playlist private? No worries, go through this post where I have explained everything step by step.
So, let’s get into details –
YouTube is one of the most widely used websites for watching various kinds of video content all over the world.
If you own a YouTube channel, you have the option of making it private, public or unlisted.
Even if all YouTube playlists are set to Public by default, there are certain boards that you can set to Private.
Do you still want to change the privacy settings for your YouTube playlists?
There must be a variety of reasons for you to change the privacy settings on your YouTube playlist.
The primary goal of this guide is to demonstrate how to make a private playlist on YouTube.
However, keep in mind that the privacy settings for playlists you’ve built vs those you’ve saved can vary.
How to Make a YouTube Playlist Private Step by Step
private youtube playlist
Go to YouTube and log into your account
Choose Creator Studio Classic from the drop-down menu
Select Video Manager from the left menu, then Playlists
Press Edit next to the playlist you want to refresh. This operation would guide you to the same playlist you want to control.
On the left, select Private, Public, or Unlisted from the drop-down menu, and then select another choice.
How to Make your Saved YouTube Playlists Private?
Here’s a step-by-step guide to changing the privacy settings for saved YouTube playlists –
Sign in to your YouTube account
Press your profile picture in the top right corner
Choose Settings from the drop-down menu
Pick Privacy from the left menu
Choose the option to make all of my saved playlists private
YouTube’s versatility is one of the main causes for its meteoric rise in success over the years.
YouTube makes it incredibly simple for content producers to reach a vast audience with their work.
As a consequence, there is a diverse variety of material from which to select. YouTube has it all, whether it’s countless fashion tips, product ratings, gaming platforms, or hours of unboxing footage.
There are bound to be a few that pique your attention among the millions of YouTube channels available. Let’s just say there’s plenty for everybody on YouTube.
Final Words
So, this was all about how to make a YouTube playlist private,if you are thinking about starting you own channel then knowing all the necessary features is a must.
In this very quick tutorial I will teach you how to make someone an editor on Twitch and what things an editor can do on Twitch.
So, without further a do let’s get into details.
Twitch was launched in the year 2011 as a gaming-focused spin-off for entertainment purpose. Twitch Interactive, the parent company, was purchased by Amazon in 2014 and since then it was developed into the go-to online destination for esports, game streaming and promoting other entertainment personalities.
You don’t need a Twitch profile to view most broadcasts, but if you want to stream for yourself or connect with networks, you’ll need one.
You will add to the conversation on certain streams, follow networks, and stream for no cost with a free version.
It’s important to note that joining a platform does not imply that you’ve subscribed to it.
There is a lot more to Twitch and that is what we are going to discuss about in this article.
You can conveniently navigate your community’s positions on the Roles list. Editor, Moderator, and VIP are the three functions that can currently be included or deleted from users.
Editors can gain access to a channel’s dashboard and assist streamers with channel management by executing the following actions –
Stream information is being edited
Breaks for commercials
Video information is being edited
Video uploading
Reruns Have Begun
Past Broadcasts Can Be Downloaded
Clips can be reviewed, searched, sorted, and deleted (including in bulk)
Authorization for channel clipping
How to Make Someone an Editor on Twitch?
Go to the dashboard to monitor the positions of your group members. From there, choose Group, then Roles Manager from the hamburger menu.
You’ll see a list of everybody in your group who currently has a job on your channel (e.g., Editor, Moderator, or VIP).
Click the Add New button in the top right corner to add or delete a role.
You may also press the + button next to a user’s name in the list to assign a function to them if they already have one in your group.
Simply press the x next to the position on their row to delete it from an actual person.
Once you’ve chosen the individual, check or uncheck the roles you want to assign to them.
Other Twitch Roles
Moderators
Moderators assist in the management of a streamer’s chat to ensure that it is safe, accommodating, and enjoyable by conducting the following tasks –
Users can be timed out or banned.
Slow, Subscriber-only, or Follower-only chat modes may be enabled.
VIPS
VIPS are those who have been given special treatment.
VIPs are important members of a streamer’s society who receive a special badge.
By finishing the Build, a Community award (50 followers and 5 exclusive chatters) in a stream, streamers will earn 10 VIP slots.
With 20/30/40/50/60/80/100 badges available at 10/15/20/25/50/100/200 unique chatters, this continues to scale. The following acts are available to VIPs:
Slow, sub-only, or followers-only modes have little effect on chat.
Rate caps aren’t an issue while you’re chatting.
Even if links are blocked, post them in chat.
Wrapping it Up…
Before you would expect to build a substantial audience or make a significant amount of money on Twitch, you must first grasp the Twitch culture and how to use it properly.
Hope this quick rundown will help you to understand different Twitch roles for your channel members and how to make someone an editor on Twitch.