Author: Vishal Patel

  • How Big is a Chunk in Minecraft?

    How Big is a Chunk in Minecraft?

    If you’re a Minecraft player, the subject of how big is a chunk in Minecraft has probably come up to your mind.

    Minecraft’s environment is filled with creatures, villagers, and an endless supply of blocks and resources.

    A game engine manages these blocks, breaking them down into pieces called “chunks.”

    Knowing how chunks function isn’t necessary for survival in Minecraft, but it does provide some interesting information.

    Here’s everything you need to know about Minecraft chunks.

    How Big is a Chunk in Minecraft?

    A chunk is a 16×16 block section with a height of around 256 blocks. In average, chunks are 65,536 blocks in size, which may seem insignificant in a gaming world of 30 million blocks.

    These chunks play an essential role in forming the basis of any Minecraft game. Because Minecraft is a sandbox game, fresh pieces are formed when you move about and explore new regions.

    If you’re curious how many pieces there are in Minecraft, there are 14 trillion chunks that can be created.

    There are 10 pieces generated automatically around the player by default so that the game doesn’t have to load them all at once.

    Based on the player’s render settings and network connectivity, this can be adjusted to as low as 3 or as high as 15.

    Chunks may not be necessary for newcomers to Minecraft, but they can be pretty useful for seasoned players who have spent years developing a vast area.

    Being close to the appropriate chunks might affect how your plants grow and even how likely you are to run into particular creatures.

    Because your plants and crops can’t develop in an empty piece, you can’t get too far away from them or they’ll become stuck in time.

    Read Also: How to Make Charcoal in Minecraft?

    Why Chunks Matter?

    While chunks won’t impact your gameplay, anyone who has been working on a map for a long time might wish to keep track of their current Chunks.

    It is possible to spawn creatures and plants only within the local render distance of their respective locations; if you run too far away, their Chunk will unload to free up processing power.

    Spawn Chunks are a special form of Chunk that covers the location you initially spawned in the universe.

    These look in-game as a typical chunk, but they will never unload from your game, making them an excellent site for mob grinders or farms.

    Aside from those instances, chunks are mostly technical jargon that you can ignore.

    Keeping track of your 16 x 16 chunks isn’t necessary for the majority of gamers, but understanding how they function might help you better understand your Minecraft environment.

    How To Find Chunk Borders In Minecraft Bedrock?

    When we talk about Minecraft chunk finder, there is an easy way to verify chunk borders. To learn how to discover chunk borders in Minecraft Bedrock, follow the steps below –

    1. To begin, collect 1.5 stacks of various types of leaves.

    2. After that, you must put a line of 40 blocks made up of leaves as the second phase.

    3. Now walk in 7 blocks from any end of the leaf line.

    4. Begin placing a second mark of leaves from the 7th block, making it 40 blocks long and perpendicular to the previous line you built.

    5. Activate the choice Fancy Leaves in the video settings.

    6. It’s time to put a new block in place of any remaining leaves blocks in any line. However, do not place the block near the intersection of the two lines you created.

    7. You should now see that the images of a portion of that line’s leaves have altered. Using another block, draw a line around the boundary.

    8. Now go back to step 5 and repeat the same with the opposite line of leaves.

    9. You should now notice that two boundaries have been drawn. Join these points together. The next step is to locate the other two borders.

    10. You should now be able to recognize the other portions in the area.

    11. All you have to do now is recognize the chunk borders by carefully inspecting the graphic change amid the lines of the leaves.

    To accomplish so, you can use the Fancy Leaves video settings.

    How To See Chunks in Minecraft?

    Let us assist you with the solution if you don’t know how to check blocks in Minecraft.

    If you wish to see the borders, press F3 + G as the command to reveal chunk borders if you’re using the Java Edition.

    Alternatively, you can hit the F3 key to bring up the Debug panel, which displays the player’s X, Y, and Z coordinates. When the player moves his or her position, these coordinates will shift.

    FAQs on Minecraft Chunks

    How Many Diamonds are in a Chunk?

    A chunk contains on average 3.7 diamonds, and a chunk is a 16×16 space.

    Is a Chunk in Minecraft 16×16?

    The game’s world generation code divides the game world into chunks that are easier for the game engine to map out. A chunk is a 16×16 block piece of a Minecraft world that is 256 blocks tall. A total of 65,536 blocks make up the chunks.

    How Many Blocks are in a Layer of a Chunk?

    In Minecraft, each Chunk is 16 blocks long, 16 blocks wide, and 384 blocks tall. This means that each Chunk is made up of 98,304 blocks, including air blocks.

    Where Can I Find Diamonds in a Chunk?

    The chunk borders may be seen by pressing F3 + G. Diamonds spawn in the 1-16 altitude range, and each Chunk contains at least one diamond or (unless it’s been overwritten by a cave). This is a time-consuming but reliable method of obtaining diamonds.

    Final Words

    Minecraft is one of the most popular online games available. It’s available in single-player and multiplayer modes.

    When you initially enter the game environment, you will be confronted with chunks.

    Aside from those instances, chunks are mostly technical jargon that you can ignore. Knowing how they work can help you understand more about your Minecraft world, but most participants won’t need to keep track of their 16 × 16 chunks.

  • How To Benefit The Most From Apple Health App On iPhone and Apple Watch?

    How To Benefit The Most From Apple Health App On iPhone and Apple Watch?

    Apple’s Health app consists myriad of information that can overwhelm an Apple iPhone or Apple Watch user. However, integrating with other applications provides you with information about your health in one place. If you use it between iPhone and Apple Watch, it is a useful tool for maintaining your ideal well-being.

    But to get the most out of this health app, you must navigate it in a better way. Here’s how you can use Apple Health App to reap the maximum benefit:

    Initiating with the App

    When you start using the Apple health app, you have first to set up your profile. The app requires you to provide some of the basic information such as your name, sex and date of birth. After giving input about yourself, you can also change those settings. Then, all you need to do is tap on the Apple ID photo present on the top right-hand side.

    This app’s health details are blood type, type of skin, and medicines that affect your heart rate. Here you can also add whether you are using a wheelchair or not. In case you are using a wheelchair or not. If you select yes, the app will not count your steps rather, it will count pushes.

    Besides your health detail, the Apple health app will also have your Medical ID, including your name, medications, height, emergency contacts, age, and allergies. All these details assist the medical authorities in viewing them if there is an emergency. This you can share at the time of emergency calls on your iPhone Lock screen. Using this Health app, you can also become an organ donor right from your profile. Not to forget, you can also export all of your health data from your profile if required. All these data you can back up and save to iCloud.

    Integrating Apple Health App with other Applications

    Apple Health App allows other apps like Clock, Fitness, Sleep, Siri, Cycle Tracking, and many more to integrate with it. In addition, there are several other third-party apps that you can integrate with your Apple Health App. For example, Percent Happier and Water Minder are some amazing apps that you can sync with your iPhone and Apple watch.

    Easy Access to Your Health Data

    On the home screen of your Apple Health App, a summary of your complete health information is present. Here you can watch your activities, health trends, level of sound in the environment, and many more things.

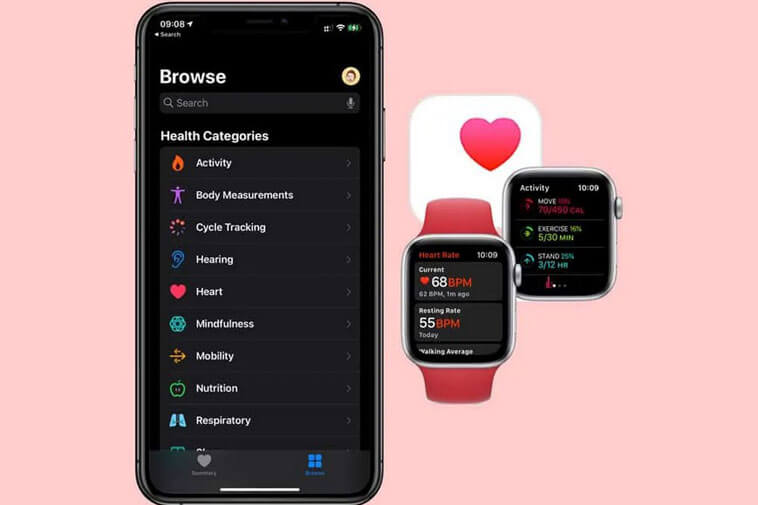
    One of the useful features of your app is Activity, where you can easily check all of your activity rings that shows the number of calories you have burned, the amount of time you have done exercise, and how many minutes you stand. To make the maximum of the attribute, you can mix activity rings with Apple Fitness +.

    The health trends feature notifies when there is any major change in some of your body parameters like heart rate or exercise minutes. In the past, we have heard how this feature has helped many by notifying them about some health changes that led them to look for life-saving medical assistance. Also, you can participate in some research studies. For example, Apple recently carried out a women’s health research study utilizing Cycle Tracking Application.

    A browse tab allows taking a deeper dive into health categories. Here, you can search for details about nutrition, respiratory vitals, nutrition, etc. Each of these categories offers you to make input some details to offer some extra insights into your health. You can also observe various trends with time and then learn about the subject. The application provides articles personalized to every topic and some third-party apps for using track-relevant data.

    Safe to Share Data with Others

    There is a “sharing” tab to share data with anyone you want easily. It is safe to offer a summary of some topics you are sharing without sharing any details. The whole information remains encrypted, and you can stop sharing whenever you want. With this app, you can also share information with your doctor and the online portal of your health system. All you have to do is sign in with your health system information. In both ways, your information remains private. When you connect, all your records are downloaded so that you can observe all information with which your doctor is working.

    So, are you using the Health App?

    Even though the app has many features, some features do not work for all. So, it is recommended to go through the app to know what works for you.


    Sources –

    9to5mac.com

  • Engineer Makes the First Ever Android Phone with a Functional Lightning Port

    Engineer Makes the First Ever Android Phone with a Functional Lightning Port

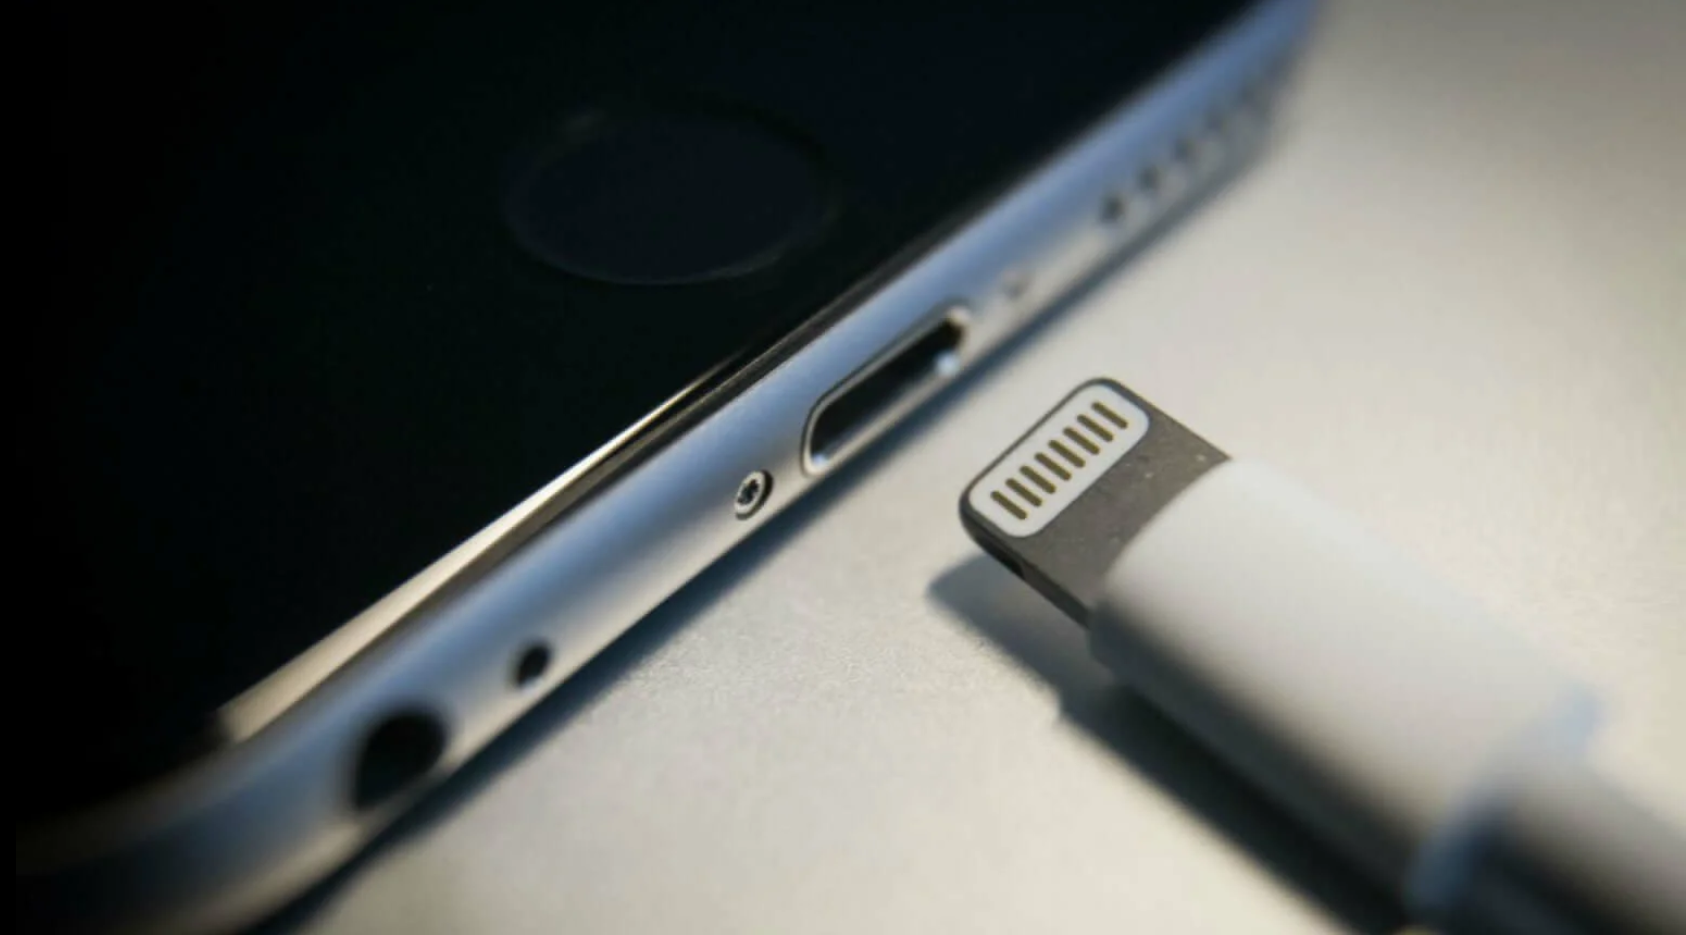
    The year 2021 saw engineer Ken Pillonel take the world by storm by making the first-ever iPhone featuring a functional USB-C port. This was good news for iPhone aficionados around the globe as Apple was refusing to introduce the same feature for a long time. This time, Pillonel has decided to impress Android users by making the first-ever Android phone carrying a working lightning port.

    Indeed, having an Android smartphone with a lighting port is not as big as having an iPhone with USB-C. Still, it’s a creation Pillonel should be proud of. In a recent video, Pillonel talked about this new creation of his.

    He made it clear that he started working on the device as a fun project and his only aim was to balance the chaos surrounding his previous creation. He deliberately chose April Fools’ Day to release the product to increase the fun quotient of the creation even further.

    He might not treat the endeavor as a serious one; however, it was not easy for him to finish the project successfully. The concept might appear to be silly to some, but the job of adding a fully functional (both for data transfer and charging) lightning port to an Android phone (Pillonel picked the Samsung Galaxy A51 for his experiment) was pretty complicated.

    Pillonel later confirmed that the project required some serious out-of-the-box thinking and complex modifications for successful completion. According to him, the biggest challenge he faced during the project was finding out a way to make the one-of-its-kind feature functional.

    The engineer affirmed that he knew that Apple’s lightning cables are intelligent enough and they will never charge any other device besides those belonging to Apple. This forced him to find a way to make the cable believe that it has been inserted into an iPhone or any other Apple device. While doing so, one of the biggest hurdles he had to overcome is ensuring that the entire thing fits perfectly inside the Android phone.

    The experience he gathered from the previous project made laying the groundwork for the new one a little easier for Pillonel.

    According to him, the earlier project was more difficult compared to this one. He feels the primary reason why things appeared easier this time is that he is more knowledgeable and better equipped now. The other reason according to him is that the quality of an Android phone is much inferior compared to an iPhone.

    When asked about the usability of an Android phone equipped with a lighting port compared to the regular ones featuring USB-C ports, Pillonel seems unfazed. He said that he knows that no one in his or her normal state of mind would want to use this mix and match device. He made it clear that the only reason for creating such an Android phone is having fun and allowing other gadget enthusiasts to feel similar excitement.

    Pillonel is all set to release a detailed explanation video about this new creation on his YouTube channel. Those interested to gather more info about the Android phone with a lightning port should wait for that video.

  • Microsoft Your Phone App is Undergoing an Identity Crisis

    Microsoft Your Phone App is Undergoing an Identity Crisis

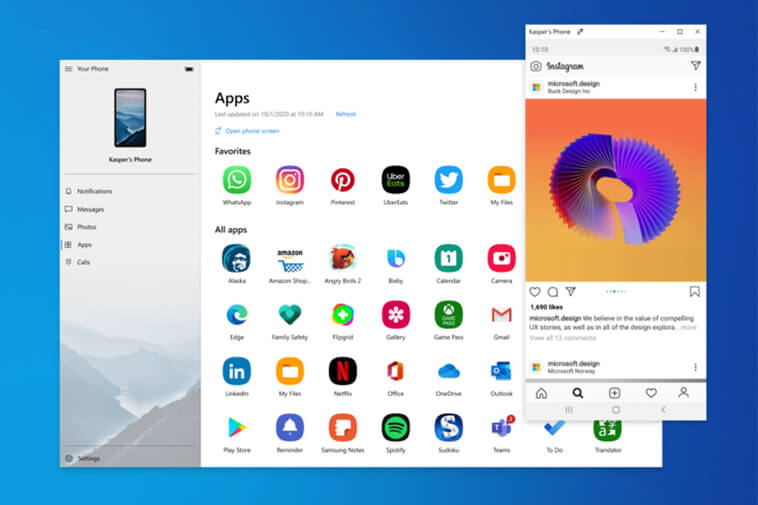
    On Thursday, Microsoft announced that it is redesigning and rebranding its Your Phone application. If you want to download it on your Windows PC, you will find it under another name, Phone Link.

    Even though the new branding is more sensible than the old brand name, Your Phone Moniker, which is quite non-descriptive, there is still some confusion as the app has a different name in its Android version.

    If you are searching for the Your Phone App on your Android device, you will get the app in the name Link to Windows in the Play Store. The name is the same as the built-in features of Samsung on its latest Galaxy devices.

    Isn’t it good if Microsoft makes one uniform name for the app on PC and the Play Store? It might require another rebranding of the application, or it can select one word across the board. Not only that but also the new phone Link app on your Windows PC has a newly designed interface. It has got one new tab for navigation. There are now upfront notifications for getting good visibility. The application also keeps messages, calls, apps, and photos in the new navigation bar present at the top. Its color matches Windows 11 design scheme, with all-new illustrations, new icons, and controls.

    Moreover, in the next update of Windows 11, you can set up Phone Link by scanning the QR code.

  • Samsung Now Allows Galaxy Users to Repair Their Own Devices

    Samsung Now Allows Galaxy Users to Repair Their Own Devices

    Tech giant Samsung has made a big announcement. Galaxy users will now be able to repair their devices thanks to the constant pressure imposed by regulators and consumers. What’s more, even US President Joe Biden had to interfere and demand the easing of restrictions on repairing Samsung devices. Biden’s request forced the Federal Trade Commission to promise that it would take necessary steps to remove illegal repair restrictions on various devices.

    According to the announcement made by the company on Thursday, users of a few flagship Galaxy devices will now be under a new program. The program will provide the users and third-party mobile repair service providers with access to authorized repair tools, genuine parts, and detailed guides for repair. Prior to this announcement, Samsung devices could only be repaired at the in-house service centers of the company.

    Users of Galaxy Tab S7+, Galaxy S20, and Galaxy S21 series will be enjoying the benefits of the newly announced program. However, individuals using devices belonging to the S22 lineup will not enjoy similar privileges. Samsung will be collaborating with an online repair group called iFixit for streamlining its new endeavor.

    For your information, Motorola has also worked with this online group for making a similar self-fixing program successful.

    November 2021 saw another tech biggie and Samsung’s biggest competitor Apple launch a similar program named Self Repair Service. The program will make Apple spare parts like batteries, camera modules, displays, and more available for purchase by third-party repair companies.

    Additionally, thanks to the program now anyone can have access to the company’s repair manuals.

    Apple’s program is yet to be launched. Initially, the company will make it accessible only to iPhone 13 and iPhone 12 users. However, in a previous statement, Apple said that it has plans to make the service available even to users having Mac computers featuring the company’s new M1 chip.

    Both Apple and Samsung have faced serious criticism from different quarters for making it almost impossible for independent repairpersons to access their devices. The companies have constantly marketed devices with non-removable batteries and memory and sealed the devices using special glue.

    When asked about their collaboration with Samsung, iFixit’s CEO Kyle Wiens said that this decision by the tech giant marks the beginning of a new era, in which manufacturers will be supporting the users’ right to fix their own products.

    He added that manufacturing companies should look to extend the lifespan of electronic goods for protecting the future of our planet. And to make that possible they must allow users to self-repair their own devices. The new program will become active within a few weeks. The results are all set to be in favor of both the users and the independent repair companies.

    Sources –

    edition.cnn.com

  • Apple Released an Update 15.4.1 to Fix the Battery Drain Issue

    Apple Released an Update 15.4.1 to Fix the Battery Drain Issue

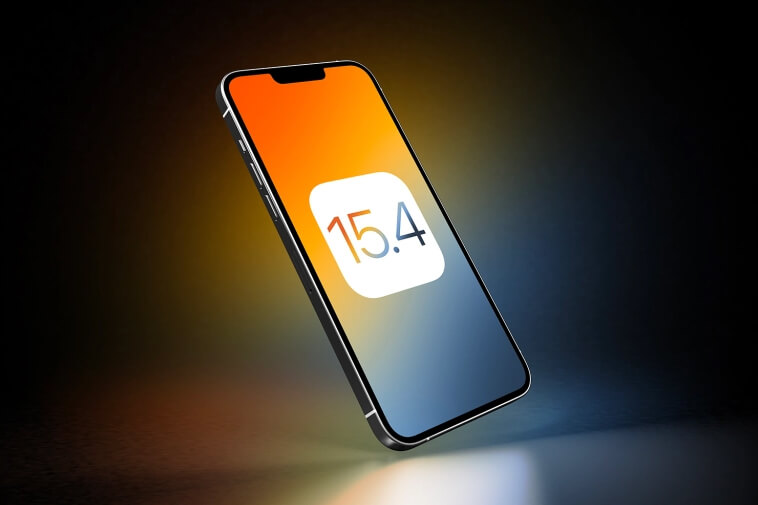
    Apple recently released an updated iOS 15.4.1 and iPadOS 15.4.1 to fix some of the accessibility bugs, enhance security, and fix the bug that was draining the battery of iPhone and iPad users after updating to iOS 15.4 two weeks ago.

    iOS 15.4 update comes in handy where you can use your Face ID while using your mask, so isn’t it shameful if people do not update just because of battery draining issues.

    Even though there was no clarity on how prevalent the issue was, Apple responded earlier this month on its Apple Support Twitter account that it’s normal for all applications and features to get adjusted to any update up to 48 hours. Even after two weeks of the iOS update 15.4 release, it is very common to find posts from iOS users complaining about poor battery life after updating iOS 15.4.

    Apple says iOS 15.4.1 consist of all security fix for all issues that might not have been explored in the wild. Even if such complaints are quite common in Apple news, it’s not a great idea for iOS users to switch off the updates. Your device needs to run the recent version of its operating system. If you want to update your iPhone or iPad, go to settings, click general, and hit Software Update.

    Sources

    theverge.com
    9to5mac.com

  • WhatsApp Enhanced its Voice Messaging Experience with Six New Features

    WhatsApp Enhanced its Voice Messaging Experience with Six New Features

    With the updated voice note features, WhatsApp has become more seamless for its users.

    WhatsApp is all set to make its voice messaging experience for its user more useful by adding six new features. While it has started rolling out for some users, more and more people will start availing of this feature in the coming weeks.

    Back in 2013, Whatsapp launched the voice messaging feature first, and it brought huge changes in the way people use the app. Voice note upgradation enhanced speed and functionality for users in order to have more expressive communications.

    Will Cathcart, Head of Whatsapp at Meta, said while speaking about WhatsApp’s popularity claims that about 7 billion voice messages are being sent daily. On Wednesday, he further tweeted that a voice message is very quick, reliable, highly expressive, and personal. With the addition of six new tools, the use of voice note experience became even better. The company announced that it had introduced six new tools for voice messages for its users and all of them have a different purpose.

    Here is the List of Six New Voice Note Features for Android Users

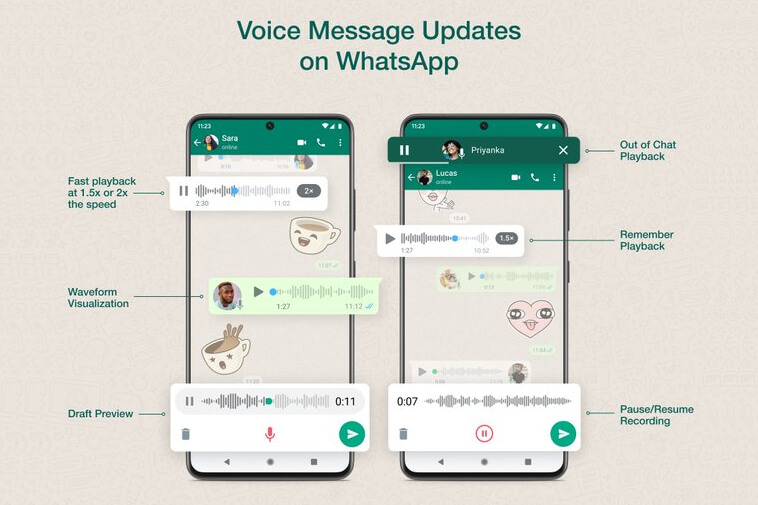
    Voice Message Updates on Whatsapp
    Voice Message Updates on Whatsapp
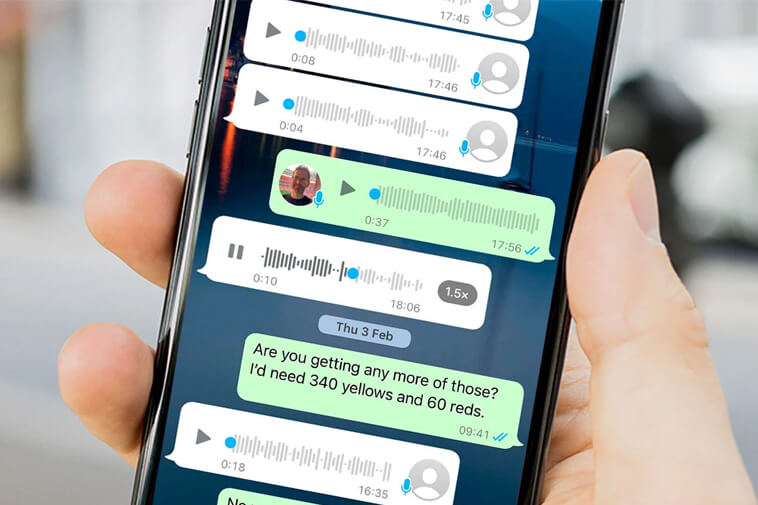
    1. Out of chat playback: This feature will allow you to listen to any voice message even if you are not in the chatbox, similar to watching a YouTube video shared on Whatsapp. It also facilitates reading and responding to other WhatsApp messages while listening to any voice sent by anyone. It appears like a bar on top of the app.
    2. Pause/ Resume recording: Now, while recording a voice message, you can pause in-between and then resume it while sending any voice message. Before you press the microphone option, you cannot stop recording in-between for gathering your thoughts before you speak.
    3. Waveform visualization: This is a small change in looks where it shows a visual representation of the voice message sound, assisting you in following the voice recording.
    4. Previewing the message before sending: You can now preview your voice note before sending them.
    5. Remember playback: While listening to any voice note, if you pause, you can now resume from where you left after returning to the chatbox.
    6. Fast playback of forwarded voice messages: You can now play the voice message rapidly at 1.5X or 2X speed if you are in a hurry. You can do this both on forwarding messages and regular messages.

    So, with all these new features rolling out, no of WhatsApp voice messaging users will increase even more. Isn’t it?

    Sources:

    businessinsider.in
    news18.com

  • YouTube TV Finally Introduced Picture in Picture Mode (PIP) on iOS

    YouTube TV Finally Introduced Picture in Picture Mode (PIP) on iOS

    YouTube made a good announcement on Wednesday for iOS 15+ users on Tweeter. The company said that its picture-in-picture mode for YouTube TV on iOS devices with iOS 15 or more is available now.

    In February, YouTube chief product officer Neal Mohon had vowed on The Vergecast that the YouTube picture in picture mode was on its way to getting available for iOS 15+ users. This feature was available for Android users for many years, but now iOS users can also avail this feature.

    YouTube Picture in picture mode will facilitate iOS users to watch YouTube TV even after navigating away from the YouTube TV app. For example, suppose you are watching your favorite match on YouTube TV but want to check your Twitter account to know about people’s reactions to an incident that just took place in the field. In such cases, this picture-in-picture feature comes handy.

    But the PiP feature is not available for all users of the YouTube app but premium subscribers. The feature is still in its testing phase, and if you are a premium subscriber, you can try this feature till April 8th.

    In February, Google had said to MacRumors that it is planning to enable the PiP feature for non-premium subscribers but does not have any update regarding that. However, we can hope for the feature to be available for all iOS users, whether premium or not in the coming months.

    Sources:

    TheVerge.com
    9to5google.com

  • What Does OVA Mean in Anime?

    What Does OVA Mean in Anime?

    Are you thinking about what does OVA mean in Anime?

    Anime is a brilliant way to enjoy and have some fun in your spare time. You might come across lingo like ordinary anime episodes, OVAs, and special episodes if you’re new to anime.

    However, to comprehend Anime, you must first grasp some fundamental concepts. ‘OVA’ is one of the most perplexing but widely used terms.

    So,

    What does OVA Mean in Anime?

    OVA stands for “Original Video Animation.” These are anime films that have been released directly to VHS, DVD, or digital home streaming, either as stand-alone films or as part of a series.

    OVA Meaning in Detail

    In anime, an ova is an unedited animated video that serves as filler between episodes and is unrelated to the plot but may be used to binge watch any show.

    However, some of the OVA serve as a link between episodes, making them quite important.

    OVAs have a smaller target audience and are primarily distributed through DVDs. They are largely non-canonical and are primarily used for promotional purposes.

    The anime industry is continuously expanding, and with it comes an increase in demand, which is why we need to grasp the significance of OVA.

    The first official OVA was published in 1983, and they quickly became popular in the anime industry.

    With a few exceptions, the majority of the OVAs contain original scripts. Because they are not broadcast on television or in theatres, they are a type of direct-to-video enterprise that does not require censorship.

    Read Also: What does ISO Mean on Facebook?

    What Is the Difference Between OVAs and Specials?

    OVAs aren’t all specials, and specials aren’t all OVAs. Specials are any extra content created for an existing anime production that isn’t an OVA.

    The special is categorised as an OVA if it was never broadcast. It’s just a standard anime if it was originally broadcast on television.

    The Importance of OVAs

    The fact that OVAs are made available for home viewing rather than being shown on a big screen contributes to their legitimacy.

    They can be any duration and utilised to help in the creative process. In the experimentation phase, OVAs can be quite valuable.

    NatsumeYuujincho: Natsume on One Snowy Day and Attack on Titan: No Regrets are two OVAs worth viewing.

    Despite the fact that they do not follow the mainstream Anime, their writing has made them quite popular among fans.

    What Is the Purpose of OVA?

    The purpose of OVAs is to increase revenue. It allows filmmakers to profit from their work by letting them to sell VHS tapes or DVDs. Unlike typical anime episodes, OVAs have no defined length, which are typically 30 minutes long.

    As a result, the OVA’s creators will be allowed to express their originality fully. The OVAs help reduce the strain on producers to produce high-quality work due to the lack of transmission.

    On the other side, OVAs are for die-hard fans who wish to see their beloved characters once more. Anime fans appreciate spending more money on DVDs and VHS cassettes that feature supplementary content for a storey.

    What if you were given the chance to view more of the story you love? You’ll almost likely buy it, and OVAs are no different. 

    If anime fans appreciate a particular story or character, they will almost certainly want to purchase related OVAs to learn more about the story or their favourite character.

    Thus, OVAs benefit both anime creators and fans alike. Anime fans will be able to watch more of their favourite characters and tales, while creators will be able to earn more money.

    Is an OVA Canon?

    Some of the OVAs are regarded as canon, while others aren’t. As a result, the status of an OVA as canon changes according to the anime. 

    Some of the producers produce OVAs based on the original anime series. If you don’t watch a canon OVA, you can lose key elements of the original series’ narrative.

    So, you should see the OVA if it is canon in order to gain a better grasp of the animated series. 

    Non-canon OVAs, are typically unrelated to the main anime series, thus you have the option of skipping them.

    Which OVAs should you Be Watching Right Now?

    If you’re an anime fan or even if you’re not, OVAs are unquestionably the best way to start your journey. 

    You don’t need any prior knowledge to get started, and you’ll be immersed in some of the best anime content available. 

    OVAs don’t need to have an episode summary. They’re primarily intended for amusement, with mild humour. If you’re bored with the usual fare, give OVAs a try for a unique and underrated experience.

    One of the most well-known OVAs is Mobile Suit Gundam: The Origin 8.3. You can also watch the Major: World anime series based on sports.

    Another example of high-quality OVA content is Attack on Titans. All of these animes have brief scripts and are quite well-made. As a result, there is no need to rely on current broadcasting and instead choose for home formats. The task will be done by OVAs.

    Final Words

    So, this was all about what does OVA mean in Anime. If you were confused about the concept of Original Video Animation then this article will give you a perfect gist of the topic.

  • How to Drag Click on Any Mouse?

    How to Drag Click on Any Mouse?

    Here I will explain how to drag click with any mouse so that you can enhance your online video game playing experience.

    If you’re reading this, you’ve undoubtedly heard about the advantages of high CPS (clicks per second) in particular games like Roblox, Minecraft, Clicker Heroes, and so on.

    One of the most successful strategies for winning some games is to use a high number of clicks per second. As a result, players had to think outside the box.

    Let us discuss about the drag clicking mouse strategy.

    This approach has grown in popularity, and it has swiftly made its way into a variety of popular games.

    The nice part is that learning to drag click isn’t nearly as complicated as it may appear.

    Getting the hang of it, though, may not always make you a better player right away but it takes some time to get used to.

    Once you’ve mastered it, it’ll help you play better in a variety of games. Not only that, but it may also assist you in completing various time-consuming chores more rapidly.

    So, is it possible to drag click with any mouse?

    All mouse does not support drag clicking. Drag clicking on an ordinary mouse will make it stop operating in a few months. For drag clicking, you’ll need a special mouse.

    What Is Drag Clicking?

    Drag clicking, also known as tap clicking or Fazer clicking, is a mouse method in which users drag their fingertips across the left and right buttons with force. This method has been shown to generate more mouse clicks than any other method.

    The friction between the mouse and button and the player’s finger allow for drag clicking. Drag clicking is when you move your hand while clicking the mouse button.

    As a result of the friction, gravity pushes the mouse downward and as you move the mouse over the button, the friction hits the button again as it bounces back. When this entire procedure is repeated, the CPS can climb to as high as 32 CPS.

    How to Drag Click?

    You would think that drag clicking is an easy operation based on the previous description.

    Nevertheless, sliding or dragging your finger on a mouse button isn’t the only way to do it. You can master this art with practice, but specific mouse devices made for drag clicking perform better than conventional mouse.

    The first step is to make sure your hands are dry, and your mouse’s surface is spotless. Sweat and dust might cause friction problems when dragging your finger across the mouse button.

    Follow these steps to become a pro at drag clicking –

    1. Hold the mouse normally, with your thumb on the left side and your ring/little finger on the right. Place your index (left mouse button) and middle (right mouse button) fingers above the mouse button’s upper edge.

    2. To drag click, gently push the mouse button in a downward motion while flicking your wrist at an angle (towards the front of the mouse). Allow your finger to glide through the button without pressing too hard. As you move your finger across the mouse button, you’ll notice a little vibration. You’ll know you’re doing it correctly when you hear a “grinding noise.”

    3. Use an online tool like RapidTables to verify that your drag clicks are truly working. It’s completely free to use, and there’s no need to install anything on your computer.

    The Advantages of Drag Clicking

    Naturally, with more clicks, you can quickly outsmart your opponents in a variety of popular games. Below are some major benefits of drag clicking –

    • If you play competitively in Minecraft or other FPS shooters, you will get the advantage from a higher CPS. More clicks each instance means more damage you can deal, which means your overall DPS could rise.
    • You can easily win games by putting out 30+ CPS and dealing extra damage by dragging clicking. The number 30 can be increased to better levels with the help of practice, making you unbeatable.
    • Another application of drag clicking is in first-person shooter games. In these games you can set your weapon to single-fire mode. After spotting an enemy, you can fire more rounds and have great recoil control. Nevertheless, you may need to practise drag-clicking a little more if you want to pull this off precisely, as your aim may suffer if done incorrectly.

    Disadvantages of Drag Clicking

    You should now have a decent understanding of what drag clicking is and how to accomplish it. However, there are a few disadvantages to consider before doing it –

    • Tap clicking exerts a lot of load on mouse switches, reducing their life expectancy.
    • Some Minecraft servers, such as Hypixel, SaicoPVP, and Mineplex, regard drag clicking as an unfair advantage and penalise players that engage in it. Check sure the server you’re playing on enables tap clicking or doesn’t explicitly forbid it before attempting to execute the strategy.

    Tips and Techniques for Better Drag Clicking Performance

    The Drop and Drag Method

    Simply following a few simple guidelines will assist you in mastering the drag-and-drop technique! Simply follow these simple guidelines to learn the art of dragging and dropping.

    Keeping a Firm Grasp

    Position your little/ring finger on the right side of your hand and your thumb on the left to grasp the mouse. To activate the left-hand menu bar, left-click with your index finger and right-click with your middle finger.

    To give the button a professional appearance, these should be put on the upper border. This helps you to have a more stable grip on the mouse in your hand and better control over it.

    Examine the Surface

    Before using the mouse, check for dust on the surface and make sure your hands are clean and dry. Keep dust and sweat away from the mouse button if you want to get the most out of it.

    Performing Drag-and-Drop Clicks

    Drag clicks are made by holding down the mouse button and flicking your wrist to the right or left, depending on your choice (towards the mouse front). By sliding your finger over the button before pushing it, you can avoid pressing it too hard.

    Put in Some Practice Time

    If you don’t put in the time to practise, it doesn’t matter how excellent your mouse is. Practice makes a man perfect.

    Handle with your Palms

    It is preferable to get a mouse that is easy to hold. Because it aligns your fingers in the appropriate spot for the movement, drag clicking necessitates a palm grip.

    Using Online Resources

    If you’re not sure if your drag-clicks are working, you can check using any internet tool. These don’t need to be downloaded and can be used right away after being accessed.

    Best Drag Clicking Mouse

    Glorious Model O

    If you explore the Internet for the greatest drag clicking mouse, you will undoubtedly come across Glorious Model O.

    This corded gaming mouse has been made to feel as though it were wireless. It also features a durable honeycomb shell that keeps your hand cool.

    This type is ideal for drag clicking and being lightweight and attractive. The matte variant has precisely the proper amount of friction to help you get a higher CPS.

    ROCCAT ROC-11-730 Kone Pure Ultra

    Thanks to its ergonomic design and ultra-lightweight construction, the Kone Pure Ultra is a one-of-a-kind mouse. It is one of the lightest mouse on the market, weighing only 66g.

    It has a new ROCCAT Owl-Eye 16,000dpi optical sensor, which allows for more precise aiming and tracking.

    It also includes a dirt-repellent coating that makes cleaning a breeze. The Kone Pure Ultra is designed for gamers who place a premium on speed.

    Is it Okay to Use Tape for Drag Clicking?

    In reality, using tape for drag clicking is acceptable because it improves dragging and clicking efficiency. Here are some suggestions that we can use:

    Silicone Grip Tape: If you want to boost your clicking speed by two clicks per second then it is possible with this tape. It’s pricey, but it’s better than electric tape.

    Razer Tape: It is not only the most expensive, but it is also the most effective. 1.5-2 cps is the increase. The dependency on mice is the only issue. I can attest to the fact that it works with Razer mice.

    Electric Tape: It is a fantastic and cost-effective option. While dragging, this method gains 1.5 CPS.

    Drag Clicking FAQs

    How to Drag Click with any Mouse?

    A regular mouse cannot be used to drag click. You’ll need a gaming mouse to drag click for the best experience. For example, Razer, Steelseries, and Golorous are among the best drag clickers.

    Can I Drag Click without a Tape?

    Yes, you certainly can. You can drag click without a tape on your hand if your hand is moist enough to create frictions.

    Can I Get Banned using Drag Clicking?

    It is debatable. Some games may prohibit you from playing by accusing you of employing drag clicking to gain an unfair advantage. Otherwise, everything is fine. As a result, carefully read the regulations and policies before implementing them.

    Final Thoughts

    Increasing your CPS by dragging your mouse across the screen is a wonderful technique to do it. You will notice an immediate improvement in your performance results.

    It’s simple to learn how to drag click; just make sure you use the right mouse. Some people are unable to cope with the stress of this procedure. After you’ve found the appropriate tool, all it takes is a little practise, and your foes won’t stand a chance.

  • How to Make Charcoal in Minecraft?

    How to Make Charcoal in Minecraft?

    Here I will explain how to make Charcoal in Minecraft step by step and will also explain the difference between coal and charcoal in the Minecraft game.

    Charcoal is used in a variety of ways in Minecraft. It is a substitute for coal that is made by smelting wood in a furnace. It has the same applications as regular coal. On the other hand, Charcoal cannot be made into a coal block. Plus, Charcoal and coal cannot be stacked together.

    In addition to having a similar look, Charcoal has the same properties as coal and may be used to manufacture torches and power minecarts with furnaces.

    The only place you can locate it is on the surface, as it does not have an ore block of its own, like coal.

    While Charcoal is used in place of coal, getting it is somewhat different.

    So, 

    How to Get Charcoal in Minecraft?

    Charcoal can be made by smelting logs or wood in a furnace. It doesn’t matter what kind of wood you use as long as the logs are still intact. 

    Burning wooden planks is not possible in a furnace to produce Charcoal. You can, rather, burn your logs with planks as a fuel source.

    What is Charcoal, Exactly?

    Charcoal is a substitute for coal, with a smelting time of 80 seconds, the same as coal.

    As a result, converting logs to Charcoal is more resourceful than using wood as a fuel in any other way.

    It’s worth mentioning that Charcoal and Coal cannot be stacked, and while they’re similar in function, they’re not the same. Charcoal is more of a slacker’s version of coal.

    The disadvantage of employing Charcoal instead of Coal is that it cannot be made into a block variant.

    If you didn’t know, coal can be turned into a Block of Coal, which expands the capacity of each furnace by one slot and burns for 800 seconds.

    This is 10 times more efficient than a single Coal, making the utilisation of blocks more efficient.

    How to Make Charcoal in Minecraft?

    In Minecraft, you’ll need the following ingredients to manufacture Charcoal –

    • Furnace
    • Logs of wood (of any variety)
    • Source of Energy

    Burning wood logs is the major ingredient in the production of Charcoal. Trees can be found nearly anywhere, and each log yields one pound of Charcoal.

    A furnace is built with eight cobblestones, and if you don’t spawn in the sky, you can always dig down for more stone.

    Here’s how to make charcoal in Mincraft game –

    1. First, locate a tree and click and hold your mouse on its trunk until a block of wood splits. This should be done for each block of wood you mine.

    2. Cut down whichever tree you like. It’ll be alright if you just use your hands.

    3. After you’ve gathered your wood logs, make boards out of one of them. You can now make a table using your four planks.

    4. Make a pickaxe and place it on your crafting table to gather some stone. Make a furnace in your crafting table with at least eight cobblestones. Place your wood logs on top of your furnace once it’s been turned on. Put your furnace in place, and you may now manufacture Charcoal with any remaining wood.

    (If efficiency is a concern, logs and planks will cook 1.5 things. Turning logs into planks for fuel is far more efficient, as each log yields four planks with the same cooking efficiency. You can also use leftover sticks to fuel your furnace, which will return 0.5 things each stick. Any leftover wood can be used to power it. Breaking it down any more would result in a loss of cooking time because two planks produce four sticks. As a result, using wooden planks is the most efficient option.)

    5. Put your favored fuel beneath the logs and wait for them to complete cooking.

    6. Your Charcoal is now ready to use!

    Read Also: How to Repair a Bow in Minecraft with Anvil, Grindstone, or Crafting Table?

    What Is the Difference Between Coal and Charcoal in Minecraft?

    Charcoal is a substitute for coal, with a smelting time of 80 seconds, the same as coal. As a result, converting logs to Charcoal is more efficient than using wood as a fuel in any other way.

    It’s worth mentioning that Charcoal and Coal cannot be stacked, and while they’re similar in function, they’re not the same.

    Charcoal is more of a slacker’s version of coal. The disadvantage of employing Charcoal instead of Coal is that it cannot be made into a block variant.

    If you didn’t know, coal can be turned into a Block of Coal, which expands the capacity of each furnace by one slot and burns for 800 seconds.

    This is 10 times more efficient than a single Coal, making the utilisation of blocks more efficient. Coal’s only functional benefit is in this area.

    What Is The Best Way To Use Charcoal In Minecraft?

    In Minecraft, Charcoal is fairly similar to ordinary coal. You can use your charcoal to fire your furnace for the same cooking time as coal. This implies that after you’ve cooked your first piece of Charcoal, you can utilise it to generate more Charcoal.

    You may light the environment around you by turning Charcoal and sticks into torches, much like conventional coal.

    For a campfire, you can also use Charcoal instead of coal.

    FAQs on Minecraft Charcoal

    Should you Make Charcoal in Minecraft?

    Charcoal is a product made from smelting logs or wood. It can be used as a fuel source or to make torches and campfires. Charcoal cannot be exchanged or converted into a block of coal.

    Which is Better Charcoal or Coal in Minecraft?

    When you use Charcoal as a fuel in a furnace, it smelts one thing per piece, whereas coal smelts three items per piece. For this reason, coal is significantly more difficult to obtain than Charcoal, although it generates 16 goods each stack against 8 for Charcoal.

    What Can We Make with Charcoal Minecraft?

    Usually one charcoal takes 80 seconds to burn in a furnace and it can be used to craft torches and cook 8 items using it as a fuel.

    Final Words

    So, this was all about how to make Charcoal in Minecraft.

    While you can substitute Charcoal for coal in crafting recipes, you can’t manufacture a block of coal with it. It’s also not possible to trade it with villagers. You’ll need to harvest coal from caves or chests if you wish to construct coal blocks for decoration or as a more powerful fuel source.

  • How to Show Battery Percentage on iPhone 12, Pro, Pro Max?

    How to Show Battery Percentage on iPhone 12, Pro, Pro Max?

    Are you thinking about how to show battery percentage on iPhone 12?

    The battery percentage is not displayed in the taskbar on the iPhone X and later models with Face ID. This is the case because newer iPhones, such as the iPhone 12 and 11 have a broad notch at the top. As a result, there isn’t enough room on the iPhone 12 to show the battery percentage.

    On the other hand, iPhone 8 and older models with Touch ID support have a built-in setting to enable the battery percentage icon.

    On iPhone 12 and related models, you can’t turn on battery percentage on the status bar. Nevertheless, you can still see how much battery life your iPhone has left.

    So,

    How to Show Battery Percentage on iPhone 12 Pro?

    Slide down from the top right corner of your phone to reveal the control centre, where the battery percentage on your iPhone will show next to the battery indicator.

    This solution has the advantage of allowing you to see the battery status even while your device is locked. Make sure the Control Center is accessible even when the phone is locked.

    There are several ways to see how much battery you have left on your iPhone.

    Read the next section of this article to get a better idea.

    How to Show Battery Percentage on iPhone 12, Pro, and Pro Max?

    Make Use of Widgets

    The widget allows you to keep track of the battery life of Bluetooth devices such as Apple Watch and AirPods.

    Follow the below steps –

    1. On your home screen, long-press (touch and hold) an empty place.

    2. In the top-left corner, tap the Plus icon.

    3. Scroll down to the Search Widgets area and hit the Batteries widget.

    4. Select the size of the widget.

    Tip: For iPhone, choose the small widget. Select the medium or large widget if you have other devices connected, which both display the battery percentage.

    5. Select Add Widget and then Done.

    This method can be used on your device if you wish to see the battery percentage all the time.

    Note: Swipe left on the home screen if you don’t want to add a specialized battery widget. On the widgets page, you can see the Batteries widget.

    Ask Siri

    If you’re a frequent Siri user, you’ll be pleased to learn that you may ask Siri any of the questions listed below. Nevertheless, there could be many more things you could say, so trust your gut and Siri will most likely give you what you want. Simply consider asking any option mentioned below.

    — Hey Siri

    • How much battery do I have left?
    • What is the current state of my battery?
    • What is the percentage of the battery?
    • Is there any remaining battery?
    • What is the state of the battery?
    • Is the battery charged?

    Charging

    You might already be aware of the fact that iPhone displays the battery percentage as soon as you plug it in for charging.

    This is another effective method to check the battery percentage on iPhone 12. 

    You’ll be able to view regardless of whether you charge your device using the MagSafe charger, lightning connection, or wireless charging.

    As long as the date and time were already displayed on your lock screen, a battery icon and percentage (e.g., “75% charged”) would briefly replace the date and time before they reappeared.

    When you wake the display from its sleep state, whether charging over a wired or wireless connection, the date on the lock screen will indicate the current “Charged” level as a percentage, e.g., “10 percent charged.”

    Third-Party Apps

    If none of the previous methods for displaying battery percentage on iPhone 12 satisfied you, third-party apps can display the existing battery percentage on iPhone in the app or widget.

    Final Words

    Now you know how to check your battery percentage on the iPhone 12.

    While the battery percentage on the iPhone 12 cannot be permanently displayed, there are several ways to check it. You may use the Control Center, add a widget to the iPhone Home Screen, or simply ask Siri. Another alternative is to tap the screen while the iPhone is charging.