Author: Vishal Patel

  • How to Lower Brightness on iPhone 11 Quickly?

    How to Lower Brightness on iPhone 11 Quickly?

    Don’t know how to lower brightness on iPhone 11? No worries, go through this quick guide to learn how to adjust screen brightness of the iPhone 11.

    iOS 11 comes with a slew of new additions and tweaks, including a massive redesign of Control Center.

    Control Center has received a full visual redesign, as well as several updates to its buttons, such as lighting and sound, which now support long press and 3D Touch as well.

    So, if you’re in bed wanting to convey a work-related email without disturbing your wife or wish to check something important, knowing how to lower brightness on iPhone 11 quickly is the key.

    No matter if you are an iPhone user or not, understanding this feature of turning down the brightness is quite easy.

    Read Also: Can I Change Clock Position on iPhone?

    How to Lower Brightness on iPhone 11: Quick Steps

    Follow the below steps to decrease brightness on iPhone 11 quickly –

    1. To open the Control Center, swipe down from the top-right corner of the window on your iPhone 11
    2. Here you will see a drag bar with sun icon
    3. Just drag down to lower the screen brightness as per your requirement

    Adjust Color Temperature and Brightness in Settings

    1. Go to the Display & Brightness section in the Settings menu
    2. To change the brightness, drag the dial to the right or left

    You can enable Dark Mode from here, which is intended to make the screen easier on the eyes.

    Dark Mode employs a dark colour scheme that applies to all applications on your device, including those that came with it and several third-party apps.

    True Tone, which is activated by default, uses specialised sensors to change the colour and strength of the screen to balance the ambient light, resulting in more natural-looking images.

    When you switch off True Tone, the show maintains the same hue and contrast independent of ambient light.

    You can also enable Night Shift mode on your iPhone 11, which changes your screen’s colours to the colder end of the scale, making it much easier on your eyes.

    1. First, go to Settings menu
    2. Then select Display & Brightness option
    3. Select Night Shift and use the color-temperature knob to make the colour temperature warmer or colder

    Brightness Levels on iPhone 11 and other Updated Models

    The ambient light sensor in iOS devices adjusts brightness depending on the light conditions in the environment.

    In dark areas, the sensor reduces visibility, and in sun light, it increases brightness. By default, the auto-brightness mode is turned on.

    When auto-brightness is activated, you’ll see that your device’s brightness slider adjusts to shifting light conditions.

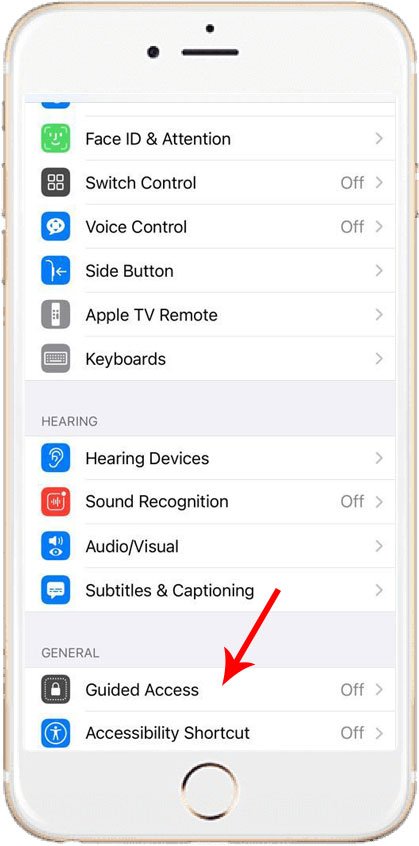
    By going to the Settings menu> Accessibility > Display & Text Size, you can toggle on or off auto-brightness function.

    To change this auto-brightness feature, toggle off and then on auto-brightness.

    Conclusion

    The brightness level of a device can seriously affect your battery levels. If you are using your iPhone on full brightness for long duration of time, then it can drain out of battery much faster.

    The key to this problem is letting the device be on auto-brightness and adjust according to the environment.

    Of course, you can change the brightness level whenever you want in seconds even when the auto-brightness feature is turned on.

  • Guided Access: How to Lock Screen on iPhone for Kids?

    Guided Access: How to Lock Screen on iPhone for Kids?

    Don’t know how to lock screen on iPhone for kids or how to restricts children from accessing certain apps on your iPhone or iPad?

    No worries, here I will show you one iPhone feature called “Guided Access” that will surely help you out.

    Kids should be encouraged to play games, watch videos without the fear of deleting any of your emails, landing on an adult-oriented website, or charging your credit card for App Store transactions.

    To make sure of it, you need to understand how to use “Guided Access” feature on your iPhone or iPad.

    So, let’s get into details –

    What is “Guided Access” Feature on iPhone?

    Guided Access is an Apple feature that allows you to lock your iPhone or iPad into a dedicated app and monitor which functions are available for that app.

    When activated, hardware keys and the touchscreen can be removed, which is a beneficial function for those who offer their smartphone to a child because it prevents them from reaching other software and settings when gaming or viewing.

    This feature outlines how to Lock Screen on iPhone for kids and how to use it and what the various control features do.

    Functions you can control with Guided Access mode on iPhone and other Apple devices –

    Disable Sleep Mode

    You can disable sleep mode in Guided Access mode if your system is scheduled to go to sleep after a few minutes. If your kid is stuck inside a video app and wants to watch without hitting the phone, this is a good option. However, please remember that the battery will be drained faster than usual. Make sure the “Sleep/Wake Button” is turned off to disable Sleep Mode.

    Lock the Volume

    Toggle the “Volume Buttons” setting to off to keep your child from turning the volume all the way up or down.

    Turn Off Motion

    When your child flips the iPhone or iPad, this feature stops the Screen from shifting from landscape to portrait mode. Toggle the “Motion” turn off.

    Turn Off Keyboards

    You may also restrict your child’s use of keyboards. If your kid has connections to an interface with a search field or any function that includes the use of keyboard, this is helpful. Make sure “Keyboards” is turned off.

    Make Certain Areas of an App Off-Limits

    You may also use Guided Access to make those areas of an app off-limits for your kids. To do so, press the Home button three times when Guided Access is running to bring up the Guided Access menu bar.

    Turn Off Touch Entirely

    You don’t want your kid to press on something in the app, do you? It would help if you switched off Contact to discourage your child from exploring other areas of the app or engaging with it somehow. Go to the Guided Access Settings tab and turn off “Touch.”

    How to Lock Screen on iPhone for kids Using Guided Access Feature?

    How to Turn on and Off Guided Access Mode in iPhone
    1. Open the Settings menu on your device.
    2. Select “Accessibility” from the settings menu.
    3. Next, scroll down to the “Guided Access” option.
    4. Switch on Guided Access function.
    5. By clicking the Home button on your iPhone, you will return to the home screen. Select the app that you’d like your child to use. Check to see if the app is appropriate for your kids. If you needed your child to only watch his or apps, you’d have to open the video player in “Kids Mode.”
    6. Directed Control mode is enabled by pressing the Home button three times.
    7. Tap the Home button three times after your child has done using the app. If you set up a pin previously, you’ll be prompted to enter it.
    8. To switch off Guided Access, tap “End.” You can finally use your iPhone and all of your applications as you normally do.

    You can also set a time limit of Guided Access function on your device. Follow the below steps to do so.

    How to Set Time Limit with Guided Access on iPhone?

    1. Tap “Settings” from the Home screen.
    2. Click on “General.”
    3. Choose “Accessibility” from the menu.
    4. Pick “Guided Access” from the drop-down menu at the bottom of the screen.
    5. Choose “Time Limits” option.
    6. On the Time Limits screen, you can configure how Guided Access’ time limit function works.

    You’ll need to decide on a tone and whether or not you want a voiced timer. To allow the time frame in Guided Access, follow these steps –

    1. Return to the Main Screen and pick the app your kid could use.
    2. To allow Guided Access, press the Home button three times.
    3. To access the Guided Access menu pad, press the Home button three times more and enter your password (if one was assigned).
    4. Go to “Options” and turn on Time Limit.
    5. Tap Done after you’ve set the time.

    Finally, tap Resume. When the timer runs out, the iPhone can now play a warning.

    Wrapping it up…

    Guided Access prevents the user from accessing more than one programme at a time.

    Let’s say, if you limit an iPhone to YouTube Kids and give it to a kid, the system would not be incomplete dismay when you return it. The home screen isn’t even accessible with this feature.

    Overall, Guided Access protects your anonymity, keeps you focused on the job at hand, and prevents unintended modifications from a third party that might be using it.  So, no matter if you are using an iPhone or iPad, simply follow this article on how to Lock Screen on iPhone for kids and take control of your Apple device.

  • How to Edit Panopto Videos Step by Step?

    How to Edit Panopto Videos Step by Step?

    Just started using Panopto software and don’t know how to edit Panopto videos? No worries, go through this quick guide and learn video editing with this video platform.

    Panopto is one of the quickest video editing platforms where teaching, training and presentation are also done.

    It is a video recording and indexing application that allows you to film presentations and render videos for class assignments.

    Panopto allows you to film from a single or different source, like the main screen, PowerPoint slides, a camera source, or a mixture of these.

    Follow the below step by step process of editing videos on Panopto.

    Read Also: How to Get Rid of Adobe Genuine Software Integrity Service?

    How to Edit Panopto Videos?

    Open the Video

    Mouse over the video you want to edit in your video library and press the Edit button.

    You may get an error message if the video is posted and a partner has pending edits that have not yet been added to the video.

    By selecting the relevant source, you can pick up where the collaborator left off with their edits or discard them altogether.

    The video will now open in Panopto’s editor.

    Modify the Title

    By clicking on the title bar and updating the text, you can change your video’s title. When you’re done, click Enter.

    Timeline

    The editor’s timeline is located at the right. A separate row shows each stream captured in the video.

    The red vertical bar will move along the timeline as you watch the video.

    Trim the Video

    Use the cut tool to trim a video. When you choose the cut tool, a dark grey line will appear at the start and end of the timeline.

    Start your video from the beginning and pause it just before you want it to begin.

    To trim out a portion of the video, select the cut tool and press and drag the grey line.

    Note: The grey line will snap into place with the red line, allowing you to make more accurate cuts.

    To take out the end of the recording, follow the same steps, and you can also click and drag in the centre of the timeline to trim certain parts.

    If you post the updates, cut parts will appear in the timeline but will not playback in the Panopto viewer.

    Since Panopto’s editor is non-destructive, we want to make sure you can re-add certain parts to your video at any time if desired.

    When you’ve finished with the updates, click Apply.

    Wrapping it up…

    So, this was all about how to edit Panopto videos.

    This platform was designed to make it easy for all to use video to exchange information.

    Panopto’s cloud-based online video editor allows basic video editing activities simple to complete right from your browser.

    The majority of video editing software takes a lifetime to master, but Panopto makes it straightforward by allowing you to clean up a finished recording before sharing it. The best part is that Panopto editing is non-destructive because you’ll still have your original file no matter what changes you make.

  • How to Create a Job Posting on Facebook in Just 5 Steps

    How to Create a Job Posting on Facebook in Just 5 Steps

    Don’t know how to create a job posting on Facebook? No worries, here I will show you 4 ways to create job post on Facebook.

    Facebook launched a new career recruitment tool in February that allows people to share and apply for jobs directly on the website.

    The new work recruitment function is a direct competitor to LinkedIn’s recruiting software. It is a quick and simple way for small companies to attract new talent and find jobs.

    If you’re one of the 40% of small companies who complain it’s more challenging than usual to fill open jobs, you’ve just discovered a new way to draw talent.

    Create job postings with Facebook, and find better employment for your small or big business.

    Employers can post jobs directly on their Facebook accounts using Facebook career postings.

    Job seekers would also use the job listings as advertisements to reach out to new employers.

    Forms can be filled out automatically with details from the applicant’s account, which the applicant can edit.

    Every day, Facebook has 1.09 billion active users, and if the ideal candidate isn’t constantly looking for jobs on career boards, there’s a fair possibility they have a Facebook account.

    If you’re in a competitive work market, using Facebook advertising to hire workers could be a brilliant idea.

    How to Create a Job Posting on Facebook?

    Let us now talk about the step-by-step process on how to post job on Facebook –

    Step 1: First, click on the down arrow showing in the top right corner and select Shortcuts.

    Shortcuts in Facebook

    Step 2: Now, scroll down to Professional section and select Jobs.

    Facebook Jobs

    Step 3 – In the next screen, click on Create Job button.

    Create Job

    Step 4: The setup menu appears after that, allowing you to customise your work posting. You can provide work-seekers with all relevant information, such as salary and position qualifications, and you can also ask personalised questions to learn more about them.

    Step 5: When you press “Publish,” you’ll be informed that your status is being checked and will be released within 24 hours if accepted. All applications received as a result of your posting will be sent to you via Facebook Messages.

    The newly generated work will appear on your Facebook Page’s “Employment” tab, where you can use Facebook’s targeting criteria for advertising your job posting to the ideal audience.

    FAQs Related on Hire on Facebook

    Is it free to post a job on Facebook?

    Yes, assigning work to the company’s home page is entirely free. If your post isn’t getting enough attention, you may want to think about paying to promote it.

    Can I post jobs on Facebook Marketplace?

    No, Facebook Marketplace is designed for local sales. If you want to share your work on Facebook, you’ll need to make a post on your company’s website about it.

    How do I advertise jobs on Facebook?

    Well, there are different means you can try such as –
    Share your article for specialist organisations.
    Directly forward the job posting to any applicants or recruiters who may be involved.
    Share the job post with your Facebook mates.
    Share the job post through all of the company’s social media pages.

    How much does it cost to post a job on Facebook?

    It costs money to post a job on Facebook if you want to “improve” it with paid ads. The advertising cost is determined by your target demographic’s size and the length of time you want it to appear. You can build a personalised budget and raise a post for as little as $1 per day.

    The Bottom Line

    With the help of this new feature by Facebook, reaching a larger audience is possible with some simple efforts.

    There are times when job seekers don’t find the right platform or way to find employment.

    As we all know, more than a billion individuals worldwide are on this social media site, so it becomes a fantastic platform for both business owners and job seekers. So, this was all about how to create a job listing on Facebook. Follow the above guide and quickly start posting jobs on FB.

  • How to Unlock Lenovo Tablet: A Quick Hack

    How to Unlock Lenovo Tablet: A Quick Hack

    How to unlock Lenovo Tablet: There can be times when you get locked out of your device due to some of the other reason. Well, there can be plenty of ways in which you can get locked out of your device but getting back inside is a stressful process.

    In this quick tutorial, I will show you the right way to unlock the Lenovo Tablet without losing data.

    Now a days, most of the devices and brands are getting serious with their security and doesn’t allow you to enter the wrong password multiple times.

    Lenovo tablets are quite famous globally and millions of customers have already bought this device.

    This device can be protected same like any other Lenovo device, which is with the help of screen lock with pin/pattern/password/fingerprint.

    If you have purchased the new models of Lenovo tablet like the Yoga, ThinkPad Yoga, ThinkPad 10 etc then it comes with preinstalled Android or Windows 8/8.1/10.

    So, the latest update doesn’t have any pop up of ‘Forgot Password’ on the screen if you cannot remember the password.

    Though there are ways in which you can still bypass Lenovo tablet, but on the stake of losing all your data.

    Follow the below steps to unlock your Android Lenovo tablet with the help of Factory reset option.

    How to Factory Reset Lenovo Tablet?

    1. Turn off your Lenovo tablet.
    2. Now turn on your device by pressing and holding the Volume UP + Power button.
    3. Here you will see the recovery menu appear, simply use the volume button to access its option.
    4. Select data/factory reset option then use the power button on your tablet to confirm.
    5. Now your system will be rebooted and factory reset will take a few minutes before you can start using your device again.

    Remember: This method will wipe away all the data from your device and you will be left with a totally clean device without any information.

    Password Reset on Lenovo Windows 8/8.1/10 Tablet

    If you are using Lenovo Windows 8/8.1/10 tablet then resetting the password isn’t so tough.

    To unlock your phone, you can simply use reset Microsoft account password option to recover your device.

    EelPhoneDelPassCode For Android is another method that is used to bypass Lenovo password.

    Though the most effective way is to use factory reset option, and if you are not sure about it then visiting the nearest service centre is recommended.

    Due to security reasons, most of the new devices has this option of clearing all the data before anyone can use the device again when locked out.

    Conclusion

    So, this was all about how to unlock Lenovo tablet in just a few steps. Though you must keep in mind that losing data is the part of this recovery process and if you use factory reset then you will end up losing all information stored in your phone.

  • How to Download Music from Apple Music to Computer?

    How to Download Music from Apple Music to Computer?

    Download Music from Apple Music to Computer: Apple Music has been a fruitful endeavour for Apple, with its customer base passing 10 million paying clients in mid-2016.

    As a music real time feature, for better saving your information on portable, Apple Music permits you to save your music, collections, and playlists to your iPhone, PC, or Mac for offline listening.

    We can just gain access to Apple Music’s whole list by applying the three-month free preliminary, or by buying its subscriptions.

    In case you drop the membership of Apple Music, then you will also lose access to the entire iTunes library.

    Though you can have an option of saving all your music before you end up with your subscription.

    In this article, we will talk about the way in which you can download Apple Music to PC.

    Before we begin, make sure that iCloud Music Library via the Music section is turned on in your Apple device.

    Read Also: How to Turn Off iPhone 8, X, XR, XS When Frozen?

    Download Music From Apple Music to Computer (PC or MAC)

    1. First go to iTunes on your computer.
    2. Next find the song from ‘My Music or Playlist’ tab that you wish to download on your computer.
    3. Now on the right side of the song, select the cloud icon on the album cover, or to the right of the playlist’s name.
    4. Select Make Available Offline option.

    Despite the fact that we can unreservedly make the most of our favourite music after subscribing in to Apple Music.

    When the membership expires, the downloads for offline listening will not be available.

    You can also download your playlist on other Apple devices.

    Download Apple Music Playlist to Other Apple Device (iPad, iPhone, or iPod)

    • Open Apple Music app on your device.
    • Next open the playlist, song or album you wish to download.
    • Now tap on the three (•••) dots on the right song or album to easily download it.
    • Lastly select Make available offline option.

    Conclusion

    Downloaded files from iTunes are encrypted that is the reason you cannot actually download these files to your PC or any other device.

    Though if you have the Apple Music subscriptions then there will be no trouble to listening to music offline. Follow the above ways to easily download music from Apple Music to your personal computer.

  • How to Turn Off iPhone 8, X, XR, XS When Frozen?

    How to Turn Off iPhone 8, X, XR, XS When Frozen?

    How to Turn Off iPhone: There are times when you tap on your iPhone screen and it becomes totally unresponsive. You try to press the power button or the volume key but nothing appears on the screen.

    Well, this indicated that your iPhone is frozen or stuck and you must do something to fix this problem.

    To be honest, using the normal or your daily way of restarting the phone might not be helpful in this case.

    That is why in this article we will demonstrate how to turn off iPhone when it is frozen.

    To get started the first thing you must understand is the combination of keys that must be pressed together in order to turn the device off.

    We will also share the combination that will help you to restart a problematic iPhone.

    Read Also: Can I Change Clock Position on iPhone?

    How to Turn Off iPhone 10 (X) and Above Models?

    Turn off your iPhone by following the below steps:

    1. Press-hold the button and the volume down button until the power off slider shows up on screen.
    2. Swipe the slider to one side to turn off your iPhone.

    The above steps will work on iPhone X and above models, if you have an older model like 8 then follow the below steps.

    Turn Off iPhone 8, 8plus, 7, 7plus and Older Models

    1. Press-hold the side power button on your device until you see the “slide to power off” pop up on the screen.

    In case the buttons on your iPhone have become unresponsive and the touch screen is working then you can turn the device off using AssistiveTouch feature.

    Follow the below steps to use AssistiveTouch on iPhone 8 and older models:

    1. First, open the iOS Settings application on your iPhone.
    2. Next switch on AssistiveTouch (found in Settings > Accessibility > Touch or Settings > General > Accessibility >AssistiveTouch . You can likewise trigger it by advising Siri to “turn on AssistiveTouch”)
    3. Press the slider close to AssistiveTouch, which adds a touch-based Home button to your screen.
    4. Press the new touch screen Home button.
    5. Click “Device”

    How to Reboot iPhone?

    A hard reset varies from an ordinary shut down in light of the fact that it’s similar to popping the battery out of your gadget and putting it back in.

    Not a delicate method to reboot your device, but rather a helpful step if the typical turn off measure doesn’t work.

    1. Press the volume up button once, and then press the volume down button once.
    2. Press and hold the side button until the screen goes dark. Continue to hold the side button until the Apple logo shows up.

    How to Force Restart iPhone 8 and older Models?

    Start by pressing and holding the side button and the volume down button until your gadget resets and you see the Apple logo appear on the screen.

    (In case you have an excessively old iPhone, like the iPhone 6S, you’ll need to hold the side/top button and the Home button, in order to force start your device.)

    Conclusion

    Next time you have a frozen/stuck iPhone and don’t understand what to do with it then don’t panic. Simply go through the above how to turn off iPhone steps and easily get back to life with your device.

  • Can I Change Clock Position on iPhone?

    Can I Change Clock Position on iPhone?

    Is it really possible to change clock position on iPhone mobile? Well, here’s everything that will help you to know either it is doable or not.

    When we talk about any kind of settings in an iPhone, it must be clear that not everything is customizable.

    Same goes with when we talk about reposition lock screen clock iPhone, then doing that is not possible.

    The iPhone clock show styling and settings are to some degree inflexible, yet a few alternatives for straightforward changes exist.

    The capacity to change the time dependent on various time regions and the arrangement in which the time is shown are basic desire among iPhone customers.

    Furthermore, making changes in the position of the clock on an iPhone is not possible.

    When you open the clock settings, then that is mostly for keeping alarms, changing time zone, stop watch and other related things.

    Changing time zone is mostly important if you are travelling or when you need to attend a virtual meeting that is in a different time zone.

    You can easily switch between manual and automatic time zone in iPhone.

    Doing the switch to manual is basic.

    1. Start by going to Settings on the iPhone from home screen.
    2. Next go to General and Date and Time option. This menu offers controls for the essential settings for the clock app on your iPhone. The menu contains just a predetermined number of highlights where clients can change the clock settings.

    In the event that the slider close to Set Automatically is in the on position, this element is set to programmed, and the time region changes the date and time as you travel through various time zones.

    To eliminate the programmed changes, tap the Set Automatically slider to the Off position.

    Then, type a city into the time region search option to set the home time region.

    The phone presently shows this time region consistently paying little heed to the genuine geographic area of the iPhone.

    Read Also: How to Customize iPhone Home Screen Layout?

    Clock Settings on the Lock Screen Display

    The lock screen shows the day, date and time naturally on your iPhone without the need of any setting changes.

    This display presentation is by default; however, you can change the background of your phone screen to impact the visibility.

    Switching the background can upgrade or darken the time show on the lock screen contingent upon the style of background you choose.

    To roll out this improvement, tap on the Settings options followed by Wallpaper.

    View the choices and pick a most liked pattern or you can also choose a photograph from your phone’s gallery.

    Select Set and choose to set the new background on the lock screen option, home screen or both dependent on close to home inclination, and check the screen to guarantee the styling looks good.

    To change the time needed to enter a lock screen when the phone isn’t being used, access the Settings and tap Display and Brightness.

    Pick Auto-Lock and select a particular measure of time from the rundown. Choices range from 30 seconds to Never, which permits power throughout when the lock screen time and date show while the phone isn’t being utilized.

    How to Change iPhone Time Settings?

    As we have already mentioned that relocate clock on iPhone is not possible but you can change the time settings.

    By default, iPhone will display 12-hour clock format on your screen which can be customized to 24 hours format which is also known as military time.

    The military time organizing is as often as possible utilized in working settings to follow explicit exercises on a 24-hour clock.

    Numerous organizations utilize this arrangement to follow minutes in gatherings.

    It forestalls mistakes when following occasions and time groupings that happen during the a.m. what’s more, p.m., while eliminating the requirement for those names.

    Access the menu by tapping Settings option, next go to General and Date and Time option, which is a similar menu used to change the time region settings.

    Tap the 24-Hour Time switch to the On and utilize this time setting.

    Leave the switch in to off if you want to stay on 12-hour time setting. After you roll out the changes, lock the screen, and the new settings results will be displayed on the screen.

    Conclusion

    In brief, there is no way you can try to change clock position on iPhone.

    Other than that, there are a few methods that you can use to customize your clock by changing the background of your iPhone screen. Additionally, you can also change time and date settings or time format (12 or 24 hours), time zone etc.

  • How to Receive Payment on Facebook Business Page?

    How to Receive Payment on Facebook Business Page?

    How to Receive Payment on Facebook Business Page: Here’s everything you need to learn how to accept payment/money on Facebook.

    Since the last decade Facebook has emerged as one of the top social media applications used by billions worldwide.

    With time each social media application has evolved and so is Facebook, initially people just used the app to connect and make new friends, but now it has a number of different aspects to it.

    In the application itself you will find various gateways of business, chatting, connecting, advertisement and much more.

    So, if you own a business then there are chances that Facebook can help run it all the way more effectively.

    From connecting with customers to receiving payments in the application itself, Facebook has come a long way.

    There are a number of ways your business can be benefit from using Facebook,

    • Facebook Product Catalog
    • Facebook Pixel
    • Facebook Messenger
    • Facebook Shop
    • Instagram Shop

    Read Also: How to Transfer Money from Paytm to Phonepe: Step by Step Guide

    More about Facebook Business Page

    Your standard Facebook Business page is easy to create and utilize. Nonetheless, that you need to utilize the web-based business capacities, for example, a Facebook Shop. You’ll have to interface an item list to your record and this for the most part requires an expense.

    Plus, if you choose to run advertising campaign, like supported posts or supported presents — you’ll need on appropriate budget.

    However, to just beginning advancing your business on Facebook with a business page, it’s totally free!

    It’s a good place for beginners and business start-ups if they are looking for an opportunity to expand their work and get hold of a larger audience.

    Let us now talk about,

    How to Send and Receive Payment on Facebook?

    There are a number of ways that you can use to receive money on Facebook on your business page.

    You can even send money to family or friends through Facebook Messenger. Other than that, in-app purchases, donations, charity, selling and buying items all is possible in the application itself.

    The principal way clients can get money on Facebook Pay is related to the Facebook Messenger application.

    You should check accessibility in your country as the component is being moved outed to a select arrangement of nations and apps.

    “$” icon on the Facebook Pay page will allow you to start the money transferring process.

    Just follow the below steps and you will be able to easily send and receive money on Facebook.

    1. Open your Facebook application and go to “Settings” > “Facebook Pay” option.
    2. Next you must add a payment method.
    3. For making payment next time go to Facebook Pay option.
    4. From there you can setup your Facebook pay in different apps including, WhatsApp, Messenger, Instagram and Facebook.

    Other than that, payments are accepted by all major Credit and debit cards along with Paypal as well.

    We must keep in mind that currently all countries don’t support this Facebook Pay feature.

    What can Facebook Pay do to your Business?

    With the help of this platform, clients are connecting payment information to Facebook, and then they start making payment with the help of Facebook Pay.

    This is the reason it is essential to coordinate your business with Facebook and start social selling.

    Facebook is viewed as one of the significant publicizing stages, as you won’t get a stage of 2 billion people all at once. Be it a product or you want to provide any kind of service, Facebook will not only give you a platform but it will also allow you to exchange payment in the application itself.

    Hope this quick guide has helped you to get started sending and receiving payment on Facebook.

  • How to Customize iPhone Home Screen Layout?

    How to Customize iPhone Home Screen Layout?

    How to Customize iPhone Home Screen Layout: Probably the greatest contrast among iOS and Android has consistently been the power of customization.

    Google’s mobile operating system allows more command over how the product looks and feels, while Apple restricts these adjustments for the sake of consistency and ease interface.

    In any case, with the release of iOS 14, iPhone and iPad proprietors are out and people are figuring out that it has different options.

    So, if you are wondering on how to decorate iPhone home screen then this is the place for you.

    For example, the way toward customizing your home screen is definitely not easy and consistent.

    Apple could’ve revealed a Settings alternative or a committed application in the phone which would allow you to customize, but that’s not the case.

    When understanding how to customize iPhone home screen you must depend on third-party applications and even workaround utilizing Siri Shortcuts.

    How to Customize iPhone Home Screen iOS 14?

    The first thing that you must do before starting the customization process is to update your iPhone to iOS 14.

    After updating, you must choose a colour pallet or theme for your phone.

    Do this by finding an appropriate photo and then saving it to your camera roll.

    As a component of this cycle, you’ll need to pick a colour range or topic, discover a background, and download it. We suggest searching through Pinterest, Google pictures, Etsy, and other similar places.

    Next you can download Widgetsmith and Shortcuts app. Both the application will allow you to customize your home screen with ease.

    Widgets add easy access usefulness to your home screen, you’ll require Widgetsmith to make a device with whatever tone, photograph, and textual style you need.

    There are options in the App Store, for example, Color Widget, however we’ve utilized Widgetsmith and can confirm it works.

    When we talk about Shortcuts, it allows you to get computerize tasks through applications or by asking Siri.

    You can likewise utilize Shortcuts to make custom application symbols. It’s been around for quite a while, yet with the arrival of iOS 14 and the capacity to add gadgets to the home screen, numerous individuals are currently matching the two functionalities to make a remarkable home layout.

    Next you can remove old applications from your home screen for better utilization.

    Do this by holding each app until you get (select Remove app > Move to App Library or Delete app) option.

    Set new wallpaper.

    Now you can start the cycle of really making your new Apple home screen.

    We should begin by setting that new background to picked in the first step. Go to Settings, tap Wallpaper, at that point tap Choose a New Wallpaper. Apple additionally has a help page here with more subtleties in the event that you need it.

    Next let’s start the process of changing app icons

    For this first open the shortcut app that you downloaded in one of the above steps from App store.

    1. In the Shortcuts application, hit the + mark to make a new shortcut.
    2. Select Add option on the following page.
    3. Quest for the “Open App” choice and select it.
    4. Tap the “I” and favourite it for speedy access later.
    5. On the New Shortcut page, tap Choose (close to Open).
    6. Search and select an application. (ex: Messenger.)
    7. Tap the three-spot menu in the corner.
    8. On the Details page, give your alternate name or wake phrase for Siri to perceive.
    9. Tap Add to Home Screen.
    10. Name your shortcut and afterward tap the symbol thumbnail close to the name you entered.
    11. You would then be able to take or pick a photograph to supplant the application’s current symbol.
    12. See your progressions and tap Add to add the application to your home screen.

    Next let us start creating customize widgets

    1. First open the Widgetsmith app on your Apple device which you downloaded in the above steps.
    2. By hitting the Add button pick a small, medium, or large widget to add by
    3. Widgetsmith may show options. You can swipe to erase or tap to redo.
    4. Select the widget you just added.
    5. Tap the Default Widget square underneath the name to begin redoing the widget.
    6. You will see the alternative to pick another style, textual style, color, and foundation tone.
    7. Tap the Back catch when done figuring out the personalisation alternatives.
    8. Tap the widget’s name at the top to rename it.
    9. Hit Save to save your changes.
    10. Now in the next step you can easily add customizable widgets to your Apple device’s screen.
    11. Go to one side of your home screen, to the Widgets page.
    12. Look to the base and tap Edit.
    13. Tap the “+” button in the corner of the screen.
    14. Search for “Widgetsmith” and tap on it.
    15. Tap the size widget you need to add and afterward select Add Widget.
    16. While the widget moves (if not, hit Edit), hold down and slide it to the home screen.
    17. If you made more than one gadget, hold down on a gadget on your screen and Edit it.
    18. Pick which Widgetsmith widget you need.
    19. Now you must arrange your home screen layout to make it look better.

    You might notice a number of widgets on your home screen, simply edit them and slide it to rearrange it however you want.

    Other then widgetsmith application you can also choose colorwidget, Widgeridoo, Widget Wizard, Widgetly etc.

    Final Words

    As we know customization is now possible with the help of iOS new update, so what are you waiting for.

    Read the above guide now and start giving your iPhone a new look and make you screen layout however you want.

  • How to Unlock Samsung Galaxy Tablet Without Losing Data?

    How to Unlock Samsung Galaxy Tablet Without Losing Data?

    Don’t know how to unlock Samsung Galaxy Tablet without losing data? No worries, here’s everything you should know.

    Smart phone and tablet users run over such circumstances in which they need to lose their information in view of the forgotten password.

    Though there are numerous strategies that guarantee to bypass the lock without losing information.

    In this guide, we will talk about the truth of such cases and present you for certain principal approaches to open Samsung tablet.

    In the event that you have failed to remember your Samsung tab password, follow the means underneath.

    Steps to Unlock Samsung Galaxy Tab Without Losing Data

    Step 1

    First install and run Android Lock Screen Removal on your desktop.

    Step 2

    Next enter the solution of “Lock Screen Removal”.

    Step 3

    After that you must connect your Samsung Galaxy Tab to the computer via USB.

    Step 4

    Now click on the “Start” button to begin the operation.

    Next you must enable your device to download mode

    How to Enable Download Mode in Samsung Galaxy Tab?

    Follow the below steps to enable your Samsung Galaxy Tab into Download Mode.

    Step 1

    First, switch off your Samsung Galaxy tab.

    Step 2

    Next press and hold the Volume Down + Home button + Power button all together.

    Step 3

    Now press the volume up button to enter into the Download mode.

    Step 4

    Next download the recover package, this will also depend upon the speed of your computer’s network.

    Step 5

    Next remove the screen lock of your Galaxy tab.

    Step 6

    After the package is downloaded it will begin with removing the screen lock.

    Step 7

    After its done, you will be able to freely use your Samsung Galaxy Tablet.

    Does Unlocking Samsung Tablet Removes SD Card Data?

    No, bypassing lock screen security requires the gadget to reset to its factory state which eradicates the internal memory of the device.  It doesn’t influence the outside memory like the SD card.

    Albeit, all the records connected with the device are additionally removed, which you can add again by signing in from the record menu of the gadget.

    Conclusion

    Regardless of what technique you use to open your cell phone or Samsung tablet gadget, there are chances that all the information will be deleted from your device.

    As an overall arrangement, backing up information on distributed storage like google drive, Dropbox, and so forth can save your significant information.

    In this way, prior to attempting to open Samsung tablet by any of the techniques, you should know about entire information expulsion saved in the interior memory of the device.

  • Unlock LG Phone – How to do it without Code

    Unlock LG Phone – How to do it without Code

    Unlock LG Phone (k30, k40, Stylo, Optimus)

    Do you forgot the passcode of your LG phone screen lock pattern and don’t know how to unlock it? No worries, go through this quick Unlock LG Phone guide to find the right solution.

    Security is an important factor for everyone, that is the reason smart phones are coming up with good safety features.

    Due to these features, there can be times that you may get locked behind your own phone or there can be a possibility that you are using an old second-hand phone and the owner is not being able to provide the unlock password.

    No matter what the reason is, getting locked on a phone is very frustrating that is the reason we present you with this article.

    Here, we will talk about how to unlock LG phone without code, so let us begin…

    Note: With the help of this method, you won’t be able to access the data stored on your phone. This is due to the security issue that if your phone is stolen and they might get access to your personal information.

    To avoid that, all the data inside will vanish and you will be left with a clean device.

    Different Ways to Unlock LG Phone

    Tenorshare 4uKey for Android to Unlock LG Mobile

    You can effectively unlock your LG smart phone with the help of this methods. Tenorshare 4uKey for Android is an excellent way of bypassing your passcode on your LG device.

    Follow the below steps –

    1. First, download Tenorshare 4uKey for Android on your computer and then install the software.
    2. Next connect your LG smart phone with your computer.
    3. Now from the options available on the interface simply select “Remove Screen Lock”.
    4. Select “Start” option and confirm.
    5. You will be notified after the lock screen has been successfully removed.

    Factory Reset to Bypass Lock Code on LG Phone

    Alternative technique which you can use to understand on how to open LG phone without code is by using the factory reset mode on your device.

    Though it is an effective option but all your data from the smart phone will be deleted instantly and you will get a clear device without any previous data.

    With all the settings including the screen lock and will reboot as a new device.

    Follow the below steps to bypass lock code on LG phone by Factory reset feature –

    1. Press and hold the Volume button and the Power button then continue to hold it till the LG logo shows up on your phone screen.
    2. Leave the Power button briefly while holding the Volume Down hold and press it once more.
    3. Leave both the button once you see the factory data reset window.
    4. Using Volume Down key, select “OK”.

    You LG device will take a few moments and it will automatically reboot with its initial settings.

    Unlock LG Phone without Code by Android Device Manager

    Another alternate technique which answers your inquiry of how to open a LG smart phone without code is by utilizing Android Device Manager.

    This component is accessible for all Android smart phone and can be utilized in the event that you lose your device.

    Below are the steps you need to follow –

    1. Open your smartphone and go to https://google.com/android/devicemanager.
    2. Use your Google account details which is connected to your LG device to login and choose the gadget.
    3. Select the “Lock” option and enter an impermanent password and snap on “Lock” once more.

    Utilize this recently made password key to open your LG phone. You can even change this secret phrase later by going to the telephone settings.

    Steps to Unlock LG Phone Screen Lock Using Google Login

    With the help of this method, you can easily use Google login to understand how to open LG Plus smart phone without code.

    This will be possible if your Google account is connected to your LG phone, it may be utilized to open the device without the necessity of the password/secret key.

    Follow the means underneath to open your LG phone without code –

    1. First go to the lock screen of your device and enter a wrong password for a couple of times, this will let you access the “Forgot Password” option on the screen.
    2. Select that option.
    3. Next you will be asked about the login details of your Google account. Simply enter that and you will be able to bypass your lock screen on LG device.

    Final Words

    So, these were different methods you can try unlock LG phone.

    Just make sure that if you have an important information stored in your phone then make sure you get the help from an expert. It will save your time and data as well.